Charging issues are among the most commonly reported problems despite the fact that the Samsung Galaxy S9 has two methods in replenishing its battery. The wired charger is often the one that may encounter issues between the two and it’s because the process depends on several factors. But whatever the case may be, you shouldn’t be able to experience these kinds of problems.
In this post, I will walk you through in troubleshooting your Galaxy S9 that would no longer charge for some reason. I will provide you the most practical ways to try and fix the problem with your device so continue reading as this article may be able to help you, somehow.
If you’re looking for a solution to a different problem with your phone, visit our Galaxy S9 Help Guides page for we have already addressed some of the most common issues with this device. We may have already published articles that can solve problems with your phone.
What to do if your Galaxy S9 won’t charge?
By the time you found out that your Galaxy S9 is no longer charging, you should immediately check the gravity of the problem. Find out if it’s still charging using the other method. For instance, if it doesn’t charge with wired charger, then check if it still charges wireless, if possible. This way, you can focus on your troubleshooting.
Assuming that the phone doesn’t charge with the wired charger only, then this is what you need to do…
- Make sure there’s enough battery left so that you could continue troubleshooting it. Use a wireless charger to replenish its battery.
- Make sure you’re using the original charger and cable because third-party accessories may not work properly with your phone.
- Check your phone’s charging port for lint, debris or even moisture. Any foreign objects may interfere with the conduction so you should get rid of them.
- Make sure you plugged the charger to a working wall outlet.
- Connect your phone to a computer to see it responds or not. If it responds, then it should also charge albeit slowly but it means that the cable isn’t broken and the problem could be with the charger itself.
- If the S9 doesn’t respond when connected to the computer, try to check both ends of the cable as something could also be obstructing proper conduction. If you have other cables, you must try using them just to find out if your phone still responds if there’s electricity flowing through the port.
- Should the device remain unresponsive to its charger or computer, it’s possible that the problem is with the hardware.
At this point, you must consider bringing the phone to a shop so that a technician can check the device for you as the problem might be the hardware.
If your Galaxy S9 doesn’t charge with the wireless charger but works with the wired, then here’s what you must do…
- Allow your phone to fully-charge using the wired charger to make sure it has enough battery for troubleshooting.
- Try doing the Forced Reboot by pressing and holding both the volume down and power keys together for 10 seconds or until the device reboots. This rules out the possibility that the problem is caused by a glitch. Remember, the firmware plays a big role in the charging process especially that we’re talking about wireless charging.
- If you have third-party case on, try removing it and place the phone on the pad. This would rule out the possibility that the case is interfering with the process.
- Make sure the wireless charger is powered on or properly plugged into a working wall outlet.
- Try to run your phone in safe mode to see if it charges when all third-party applications are temporarily disabled because if it does, then there should be an app that’s causing the problem. You may uninstall the app that’s causing the problem but if your phone doesn’t charge even in this mode, then try the next procedure.
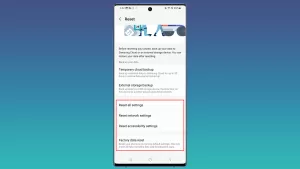
- Backup your files and data and reset your phone. As I said earlier, the firmware plays a big role in the charging process and it’s possible there are some issues with it. So, to bring the device back to its default configuration, you must reset your device.
The following are procedures I mentioned in the guide above in case you don’t know how to do them…
How to reboot Galaxy S9 in Safe Mode
- Turn the device off.
- Press and hold the Power key past the model name screen appearing on the screen.
- When SAMSUNG appears on the screen, release the Power key.
- Immediately after releasing the Power key, press and hold the Volume down key.
- Continue to hold the Volume down key until the device finishes restarting.
- When Safe mode appears in the bottom left corner of the screen, release the Volume down key.
- While in Safe mode, you can now uninstall apps that are causing a problem.
How to effectively reset your Galaxy S9
- Back up data on the internal memory. If you have signed into a Samsung account on the device, you have activated Anti-theft and will need your Samsung credentials to finish the master reset.
- Turn off the device.
- Press and hold the Volume Up key and the Bixby key, then press and hold the Power key.
- When the green Android logo displays, release all keys (‘Installing system update’ will show for about 30 – 60 seconds before showing the Android system recovery menu options).
- Press the Volume down key several times to highlight ‘wipe data / factory reset’.
- Press Power button to select.
- Press the Volume down key until ‘Yes — delete all user data’ is highlighted.
- Press Power button to select and start the master reset.
- When the master reset is complete, ‘Reboot system now’ is highlighted.
- Press the Power key to restart the device.
Seek Help
If your Galaxy S9 neither charges with wired charger nor with wireless, you may still try doing the procedures above and if they don’t help, then bring your device to the store so that a technician can check it up for you. There could be a problem with the hardware and it’s imperative a technician can diagnose the issue problem. It’s for you own safety.
I hope that I’ve been able to help you through this post one way or the other. If you think this post is useful, please spread the word by sharing this post to your friends as they, too, may have similar issues. Thanks for reading!
