This post will walk you through setting up and deleting a Samsung account on a Samsung Galaxy A series device. Here’s a quick guide on how to add/remove a Samsung account on Galaxy A33 5g.
Having trouble adding or deleting a Samsung account on your Samsung phone? Consider reviewing the outlined steps below to ensure that you’re doing it right. Just read on for more detailed instructions.
Samsung Account Setup
If you own a Samsung smartphone or tablet, setting up a Samsung account on your device is the one of the first things that you should do. With a Samsung account, you can have access to many exclusive apps such as Samsung Pay and SmartThings.
A Samsung account is also needed for you to back up, restore, and sync important files across multiple Samsung devices. You will also be required to provide a valid/registered Samsung account when retrieving a forgotten user ID or password.
That said, Samsung strongly encourages users to take full advantage of securing a Samsung account to avail a free built-in membership service on all of their Samsung devices.
Setting up a Samsung account is very straightforward as the entire process is done through a setup wizard. This means that you will just have to enter the required information into the provided text fields or respond to a given question or selection.
Once the account is set up on the phone, you’re all set to make full use of all Samsung-related services using your account details/credentials.
Every Samsung device also allows you to delete an existing Samsung account and replace it with a new one. An option to remove the account is available on every Samsung device allowing you to delete an existing account that you longer use.
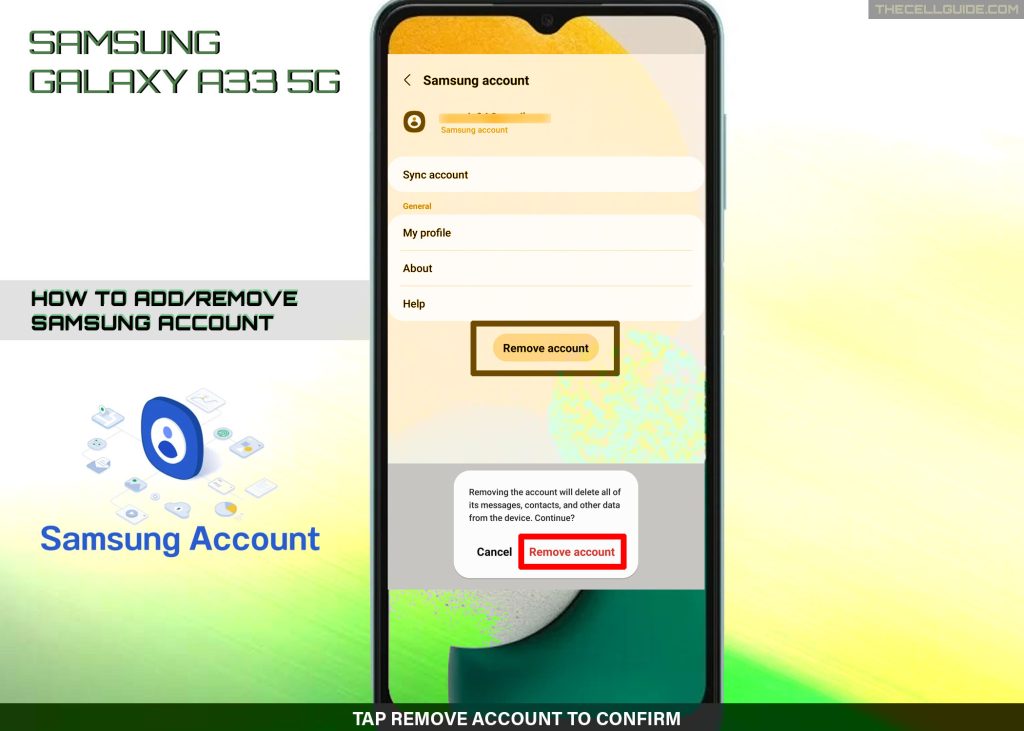
Removing an account from your device will delete all of the messages, contacts and other data that are linked to that account on your device.
If you’re new to the Android 12 with One UI OS version and need some input on how to get these things done on your Samsung Galaxy A33 5g smartphone, you can refer to the step-by-step walkthrough as follows.
Steps to Add/Remove Samsung Account on Galaxy A33 5g
The following procedures are also applicable when adding and deleting a Samsung account on other Samsung phones with the same Android or One UI version as that of the Galaxy A33 device.
However, there may be some slight differences on every device’s user interface given that actual screens and menu items may likewise vary between device models and network operators. To ensure all key features and menu options are present, keep your device software updated.
Feel free to start whenever you’ve got all the necessary account details ready.
A. Deleting/Removing a Samsung Account
Performing these subsequent steps will delete any unnecessary Samsung account from your device. Deleting an account from your Galaxy device is recommended if you’re no longer using it or if you no longer want that account to be associated with your device.
Just follow these steps whenever you’ve got everything ready.
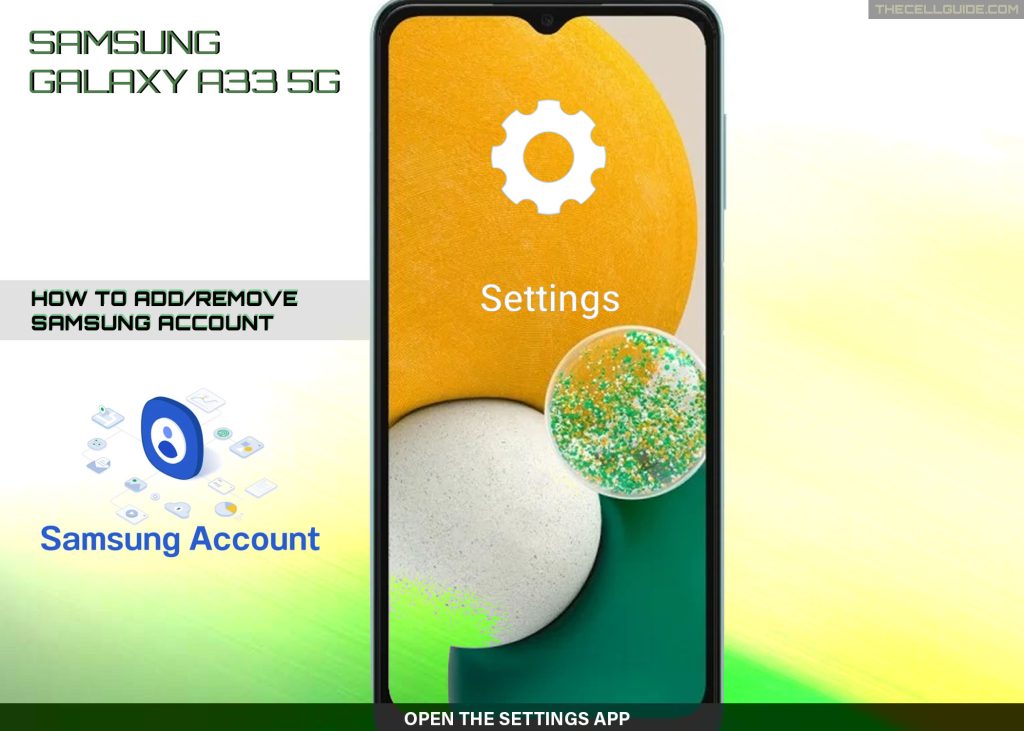
Step 1: Tap Settings from the Home screen or Apps tray to get started.
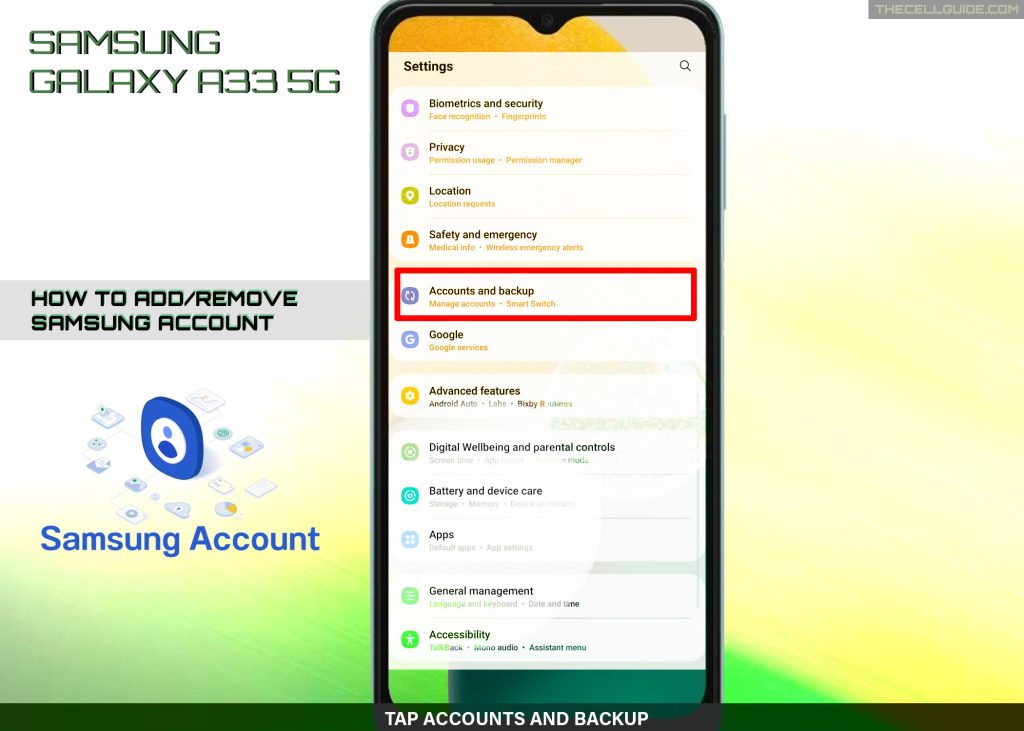
Step 2: While in the main settings app menu, find and then tap Accounts and backup.
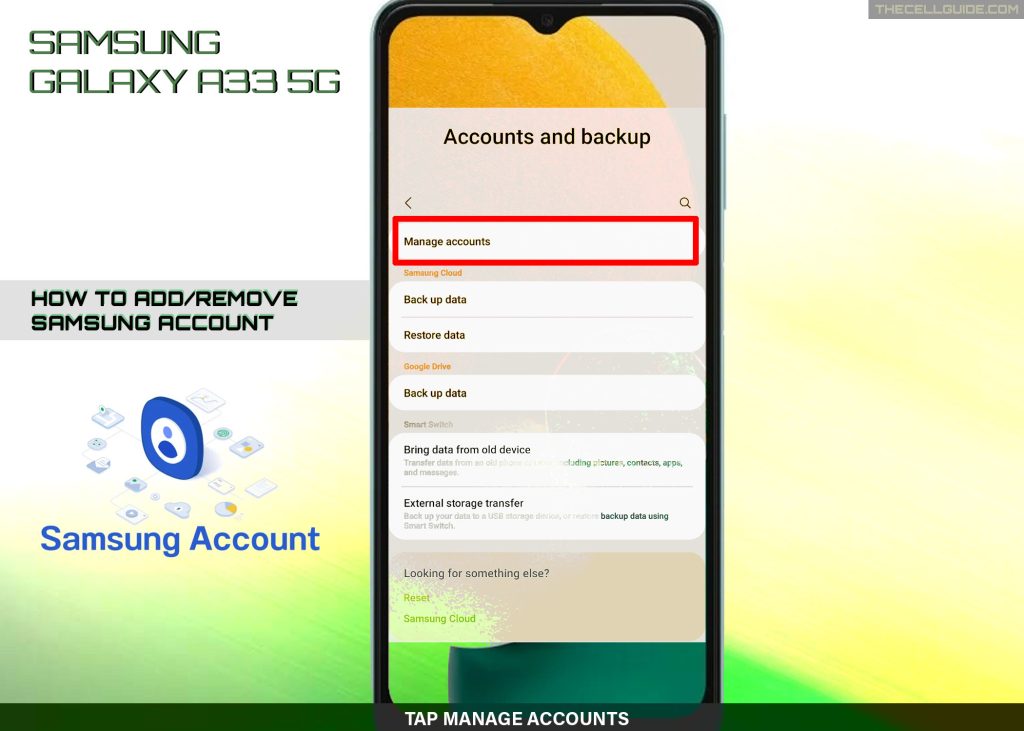
Step 3: To continue, tap Manage accounts and then navigate to the Manage account section on the next screen.
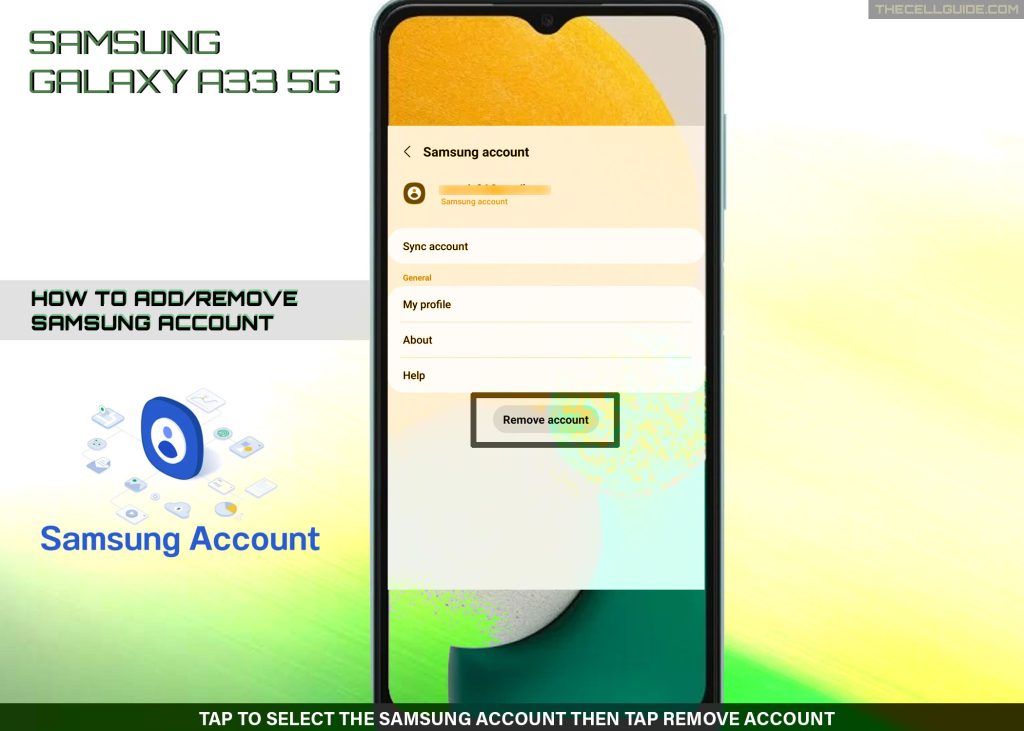
Step 4: Select your Samsung account then tap Remove account on the following screen to proceed.
Step 5: Read the warning message and then tap Remove account. If prompted, sign out from all Samsung-related services and then tap Sign out to confirm.
Step 6: For security purposes, you will also be asked to enter the correct password for the Samsung account that you’d like to delete. Just enter the correct password to confirm and authorize account deletion requests.
Be sure to note that deleting an account also means losing access to any of the account’s data unless you will add it back on your phone again.
This applies to any type of account that’s set up on the phone including Google and Samsung accounts.
B. Adding a Samsung Account
The following steps will let you add or set up a new Samsung account on the Galaxy A33 5g device. Be sure to get your account details (User ID and password) ready beforehand.
Step 1: Tap Settings from the Home screen or Apps tray to launch the settings app.

Step 2: In the settings menu, tap Accounts and backup.

Step 3: On the succeeding screen, tap Manage Accounts. A list of different account types that you can set up on the phone will load up next.

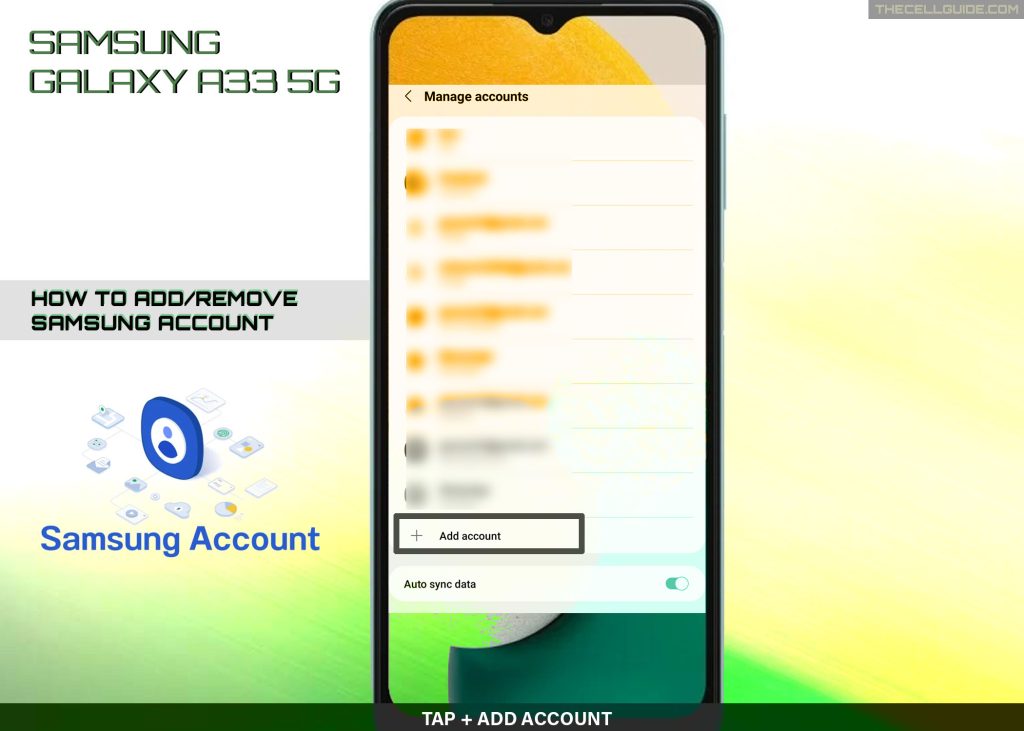
Step 4: Scroll down and then tap + Add Account.
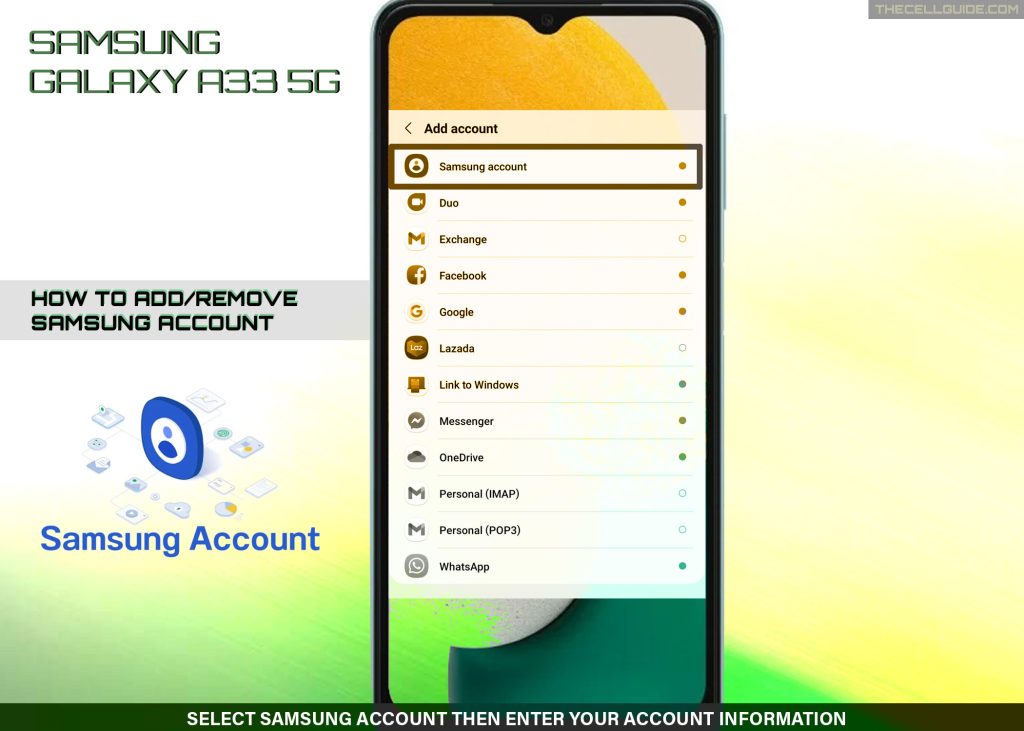
Step 5: Select Samsung account from the list and then enter a valid email address or phone number and password into the provided text fields.
Step 6: After entering the account credentials, tap Create account and follow the succeeding instructions to complete the account setup process.
The new Samsung account will then be created and used to sync with Samsung-related apps and services on your device.
And that’s how adding and removing a Samsung account is done on the Galaxy A33 5g smartphone and other Samsung phones that are running on the same Android/One UI version.
Hope this helps!
Please check out our YouTube channel to view more tutorial and troubleshooting videos for popular iOS and Android devices.


