How to Enable and Disable Automatic Updates on Galaxy A53 5g
This post will walk you through turning the automatic updating feature on a Samsung Galaxy smartphone running on the latest One UI version. Read on to learn how to enable and disable automatic updates on your Samsung Galaxy A53 5g smartphone.

Keeping apps and the device’s system up-to-date is highly recommended to ensure optimum performance and system stability. Not only that new updates bring in new features, they also contain essential patches to get rid of stubborn bugs and malware that cause different types of problems from in-app glitches to performance issues.
Periodic updates that are rolled out by app developers and device manufacturers can be implemented automatically and manually depending on the user’s preferences. And this walkthrough will show how it’s done on the Galaxy A53 5g handset.
One UI 4 Auto-Updates
Every smartphone receives regular updates for apps and operating systems. Some updates are automatically implemented while some require manual downloading and installation.
The process of downloading and installing software updates varies between device models, software versions, update types and service providers.
In Android devices, app updates are accessible through the Google Play Store application. System updates on the other hand are accessible through the settings menu, particularly from the software update section on the phone.
Users have the option to enable and disable automatic updates as they prefer. All it requires are a few tweaks on the Play Store app and system settings.
If you’re new to the One UI 4 platform and need some input on how to access and manage the auto-update feature on your Samsung Galaxy A53, you can refer to the outlined steps as follows.
Steps to Enable/Disable Automatic Updates on Galaxy A53 5g
In order to download and install software updates, the phone must be connected to the internet either through cellular/mobile data or Wi-Fi network. The phone must also have sufficient battery life and storage space to allocate the new update file.
A. Enabling/Disabling Automatic App Updates on Play Store
These steps also apply to other Samsung phones running in One UI 4 equivalent to Android 12. Actual screens and menu items may vary between device models and carriers.
You may start whenever you’re ready.
Step 1: Tap the Play Store icon from Home to open the Play Store.

Step 2: Tap on your Play Store account profile.

Step 3: From the Account menu, tap Settings.

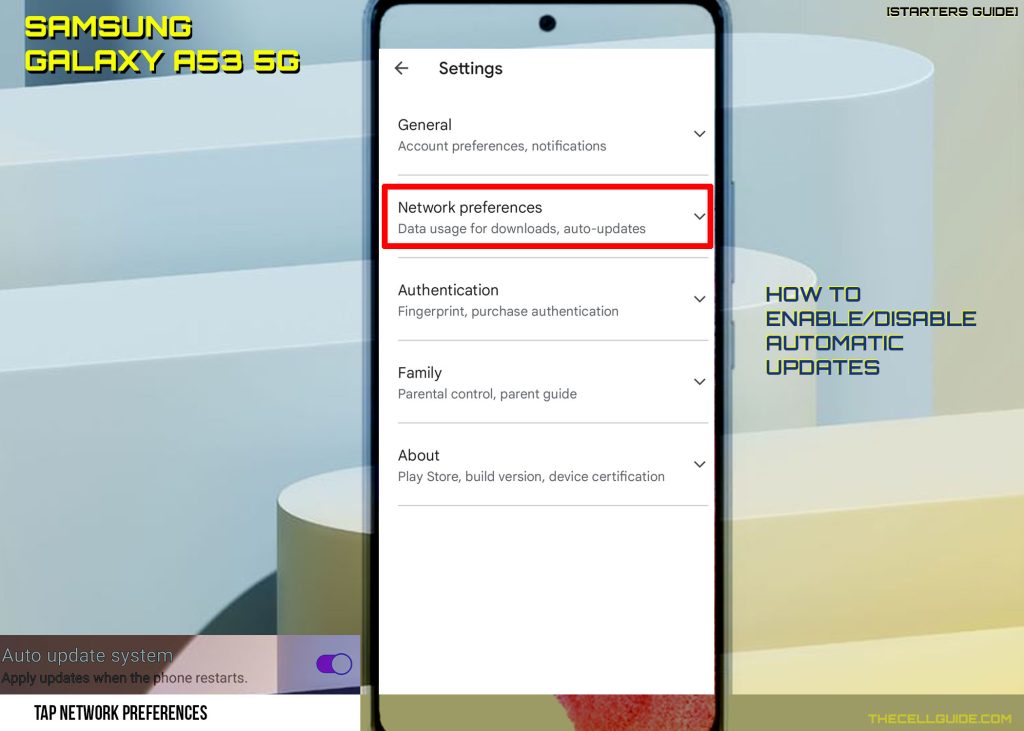
Step 4: Select Network Preferences on the following screen to proceed.
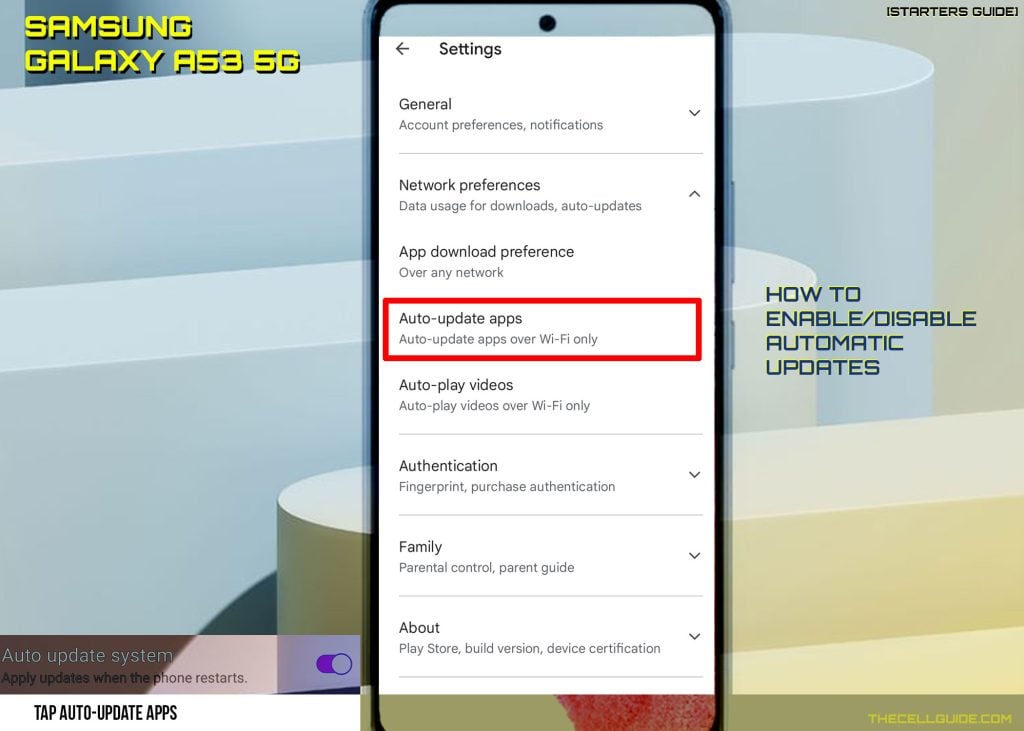
Step 5: Next, tap Auto-update apps.
Step 6: To enable automatic app updates, select Over any network or Wi-Fi only. That will prompt the device to update apps automatically when connected to the internet via Wi-Fi network.
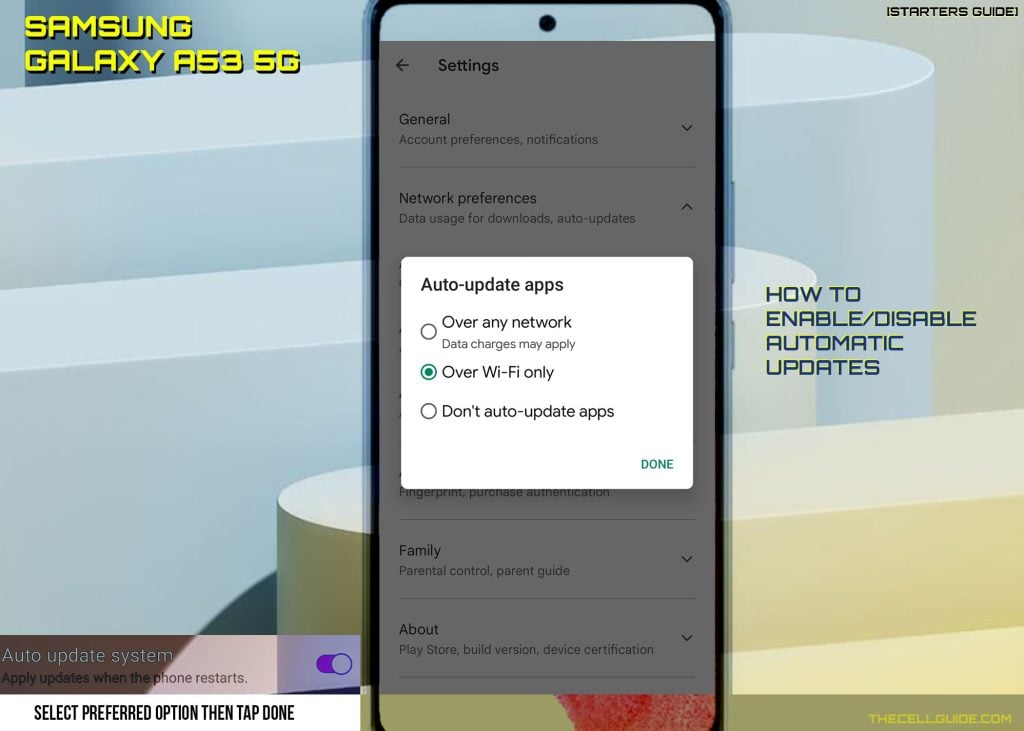
To disable auto updates for Play Store apps, select Don’t auto-update apps then tap Done to apply the changes.
B. Enabling/Disabling Automatic Software Updates
The following steps are based on the One UI 4 interface, equivalent to Android 12 and therefore also applicable to other Samsung devices with the same software version.
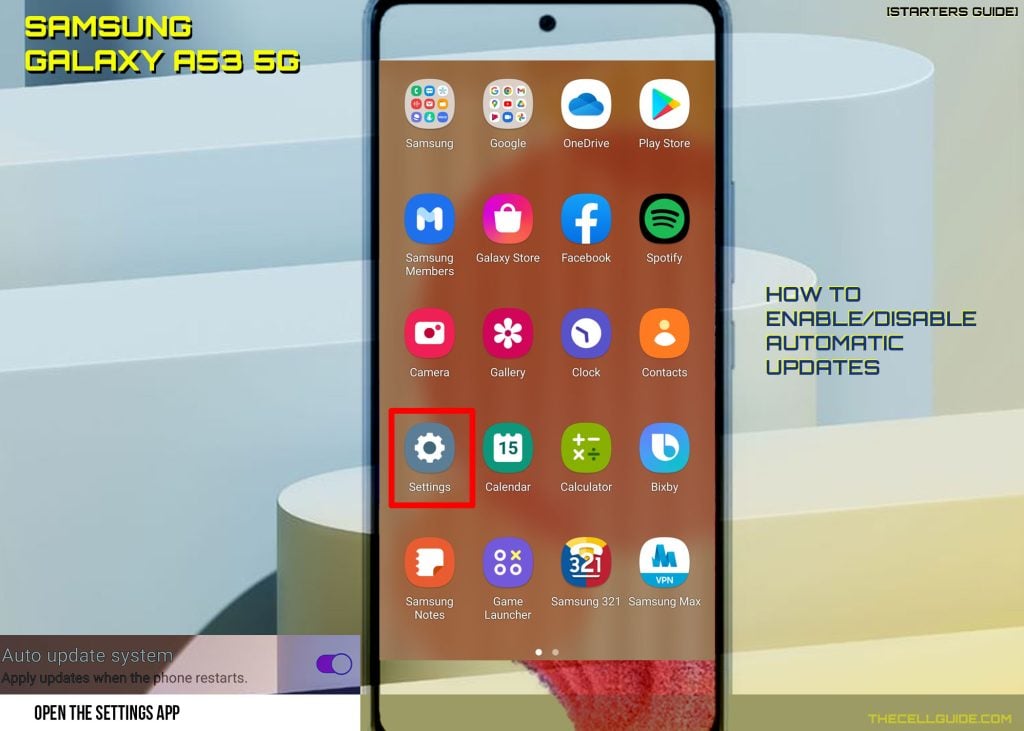
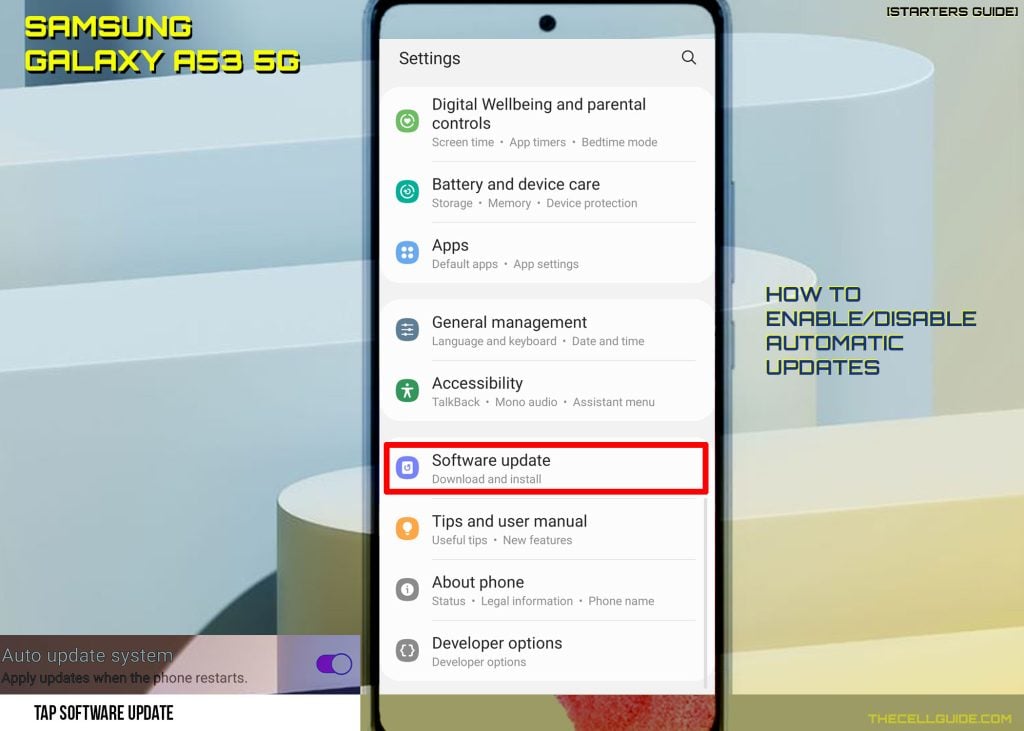
Step 1: Tap Settings from the Home/Apps screen to open the Settings app menu.
Step 2: On the Settings menu, scroll to find and then tap Software Update.
Step 3: To enable auto-update downloading, turn on the switch next to Auto download over Wi-Fi.
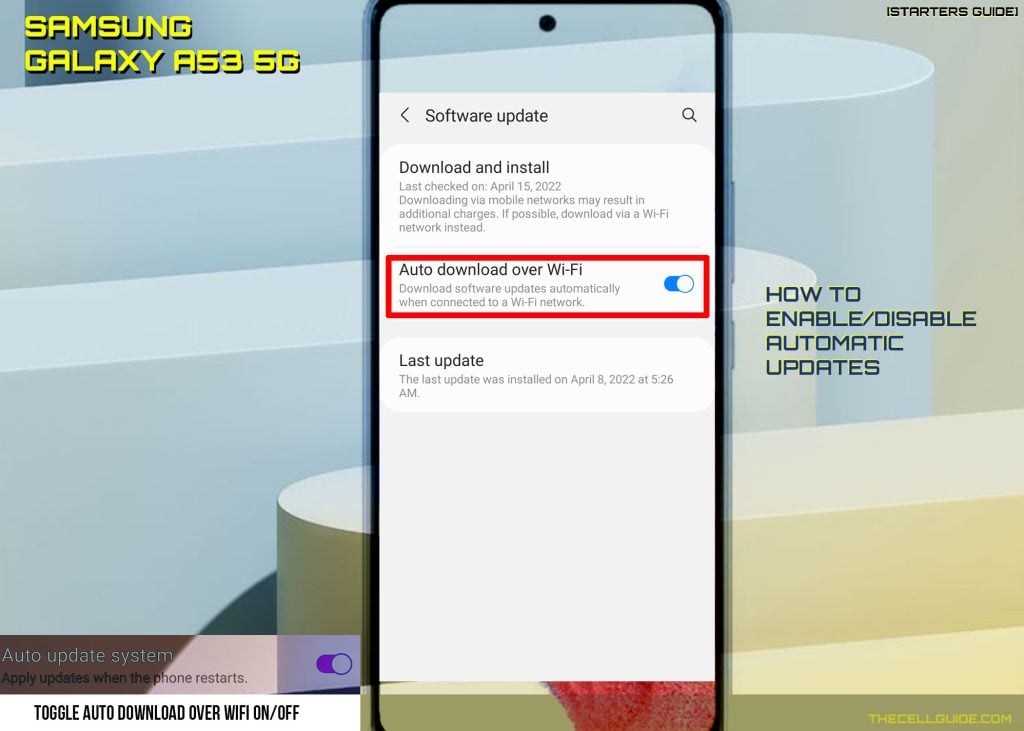
Doing so will prompt the device to download any available software updates automatically when connected to a Wi-Fi network.
To stop the phone from downloading new updates automatically, turn off the Auto download over Wi-Fi switch.
Enabling/Disabling Automatic System Update via Developer Options
Alternatively, you can enable and disable automatic system updates through the Developer options menu.
To do this, you will need to unlock the developer mode and then find the Auto-update system from the given options. To view the steps on how to access this secret Android menu, you can refer to a separate guide on how to enable developer options through this link.
While in the Developer options menu, simply toggle the auto-update system switch on if you want your phone to automatically apply new updates when it restarts or off you don’t.
Updating via Android Recovery Mode
System updates can also be manually implemented via Android recovery mode. A special tweak is required in order to put your phone in this state.
While in the Android system recovery, find and choose the option to apply update from ADB or apply update from external SD card.
This method is usually regarded among the last options when having trouble updating the device’s operating system using the usual methods.
And that covers everything in this quick walkthrough.
If you have trouble updating your phone or apps, optimize the device storage by freeing up old and unwanted content.
Hope this helps!
Please check out our YouTube channel to view more tutorial and troubleshooting videos for popular iOS and Android devices.