A flickering screen could be due to a minor glitch in the app or firmware but it could also be a sign of a serious hardware problem depending on how it started. This problem may happen even to high-end devices like the Samsung Galaxy S9 and many users have actually reported such issue. I personally encountered this kind of problem and while you can continue using your phone even if the screen flickers from time to time, it’s very annoying if you have it especially if your device is expensive.
If the screen keeps on flickering for no apparent reason, you should take time to troubleshoot it to be able to determine why it occurs in the first place and learn how to fix it. That’s the very purpose of this post and we will subject the Galaxy S9 in our troubleshooting here. I already know a thing or two that could help you fix the flickering screen issue with your phone and I will share it with you so continue reading as this post may be able to help you.
Possible Causes
- Software glitches: Sometimes, software glitches can cause the screen to flicker. This can happen after a software update, when installing a new app, or due to a conflict between two apps.
- Hardware problems: In rare cases, a hardware problem, such as a faulty display or loose connection, can cause the screen to flicker.
- Physical damage: If the screen has been dropped or damaged in any way, this can also cause it to flicker.
Troubleshooting Galaxy S9 with screen flickering issue
I will share with you the practical ways in troubleshooting a Galaxy S9 with some issues with its screen. Here’s how…
- Perform the Forced Reboot – this will refresh your phone’s memory and reload all its apps and services. You need to do this as it’s possible that the flickering is due to a minor glitch caused by apps or with the firmware. To do this, press and hold the volume down and power keys at the same time for 10 seconds or more. Your phone may reboot like it normally does and after which, observe to see if the flickering continues. If it does, then move on to the next procedure.
- Run your phone in safe mode – this is to know if the flickering is caused by a some graphics-intensive apps or games. By running your phone in safe mode, you’re temporarily disabling all downloaded applications so if the flickering doesn’t occur while in safe mode, it means that there’s really a third-party app that’s causing it. Find out which of your apps is causing the problem and if the flickering is really bad that you can’t stand it, then uninstall that app.
- Wipe cache partition – you only have to do this if the flickering continues even if your phone is in safe mode. It’s because it’s possible that the cause of the problem are some corrupt system files. At this point, it’s best to just delete all system cache so that they will be replaced with new ones. You will have to reboot your phone in Recovery Mode to be able to wipe the cache partition. Please refer to the instructions below.
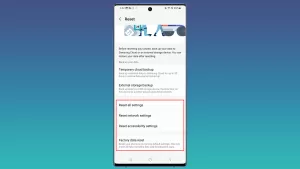
- Backup important files and reset your phone – this is your last resort and if the problem continues after this, then a technician should check your phone for you. You need to do this because it’s also possible that there’s a problem with the firmware and the flickering could be just one of its signs. Before the reset though, make sure you create a backup of your important files and data as they will be deleted during the process. Follow the instructions below.
- Bring the phone to the shop – after doing the procedures above and your phone is still flickering, then you must bring it back to the store or to the shop so that a technician will check it up for you. It’s possible now that the problem is with the display and not just due to glitches with the software.
How to Wipe Cache Partition in Galaxy S9
- Turn off the device.
- Press and hold the Volume Up key and the Bixby key, then press and hold the Power key.
- When the Android logo displays, release all three keys.
- An ‘Installing system update’ message will show for 30 – 60 seconds before the Android system recovery menu options appear.
- Press the Volume down key several times to highlight wipe cache partition.
- Press Power key to select.
- Press the Volume down key to highlight yes, them and press the Power key to select.
- When the wipe cache partition is complete, Reboot system now is highlighted.
- Press the Power key to restart the device.
How to Master Reset Galaxy S9
- Back up data on the internal memory. If you have signed into a Samsung account on the device, you have activated Anti-theft and will need your Samsung credentials to finish the master reset.
- Turn off the device.
- Press and hold the Volume Up key and the Bixby key, then press and hold the Power key.
- When the green Android logo displays, release all keys (‘Installing system update’ will show for about 30 – 60 seconds before showing the Android system recovery menu options).
- Press the Volume down key several times to highlight ‘wipe data / factory reset’.
- Press Power button to select.
- Press the Volume down key until ‘Yes — delete all user data’ is highlighted.
- Press Power button to select and start the master reset.
- When the master reset is complete, ‘Reboot system now’ is highlighted.
- Press the Power key to restart the device.
I hope that this troubleshooting guide can help you. Please help us spread the word by sharing this post to your friends especially if they, too, have some issues with their phones. Thank you for reading.

