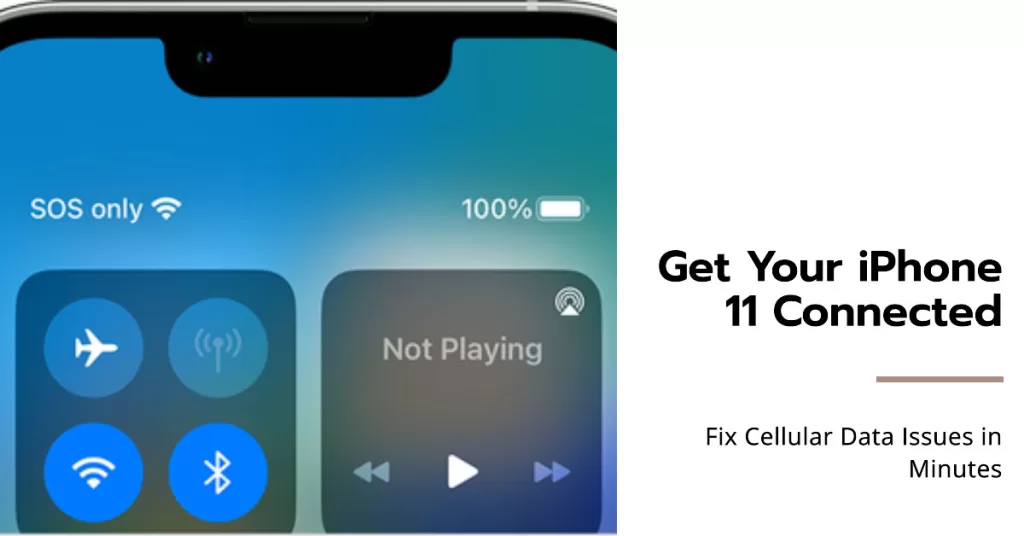
No Bars? No Problem! How to Fix Cellular Data Not Working on iPhone 11
Seeing no service on your iPhone 11? Don’t lose signal, this guide will help restore cellular data access. Read on to learn what to do when cellular data is not working on your iPhone.
Reliable cellular data connectivity is essential for always-on access to apps, email, and internet browsing when WiFi isn’t available. But sometimes your iPhone 11 may inexplicably lose service, reporting no bars and inability to use mobile data. Understandably frustrating when this vital feature stops working!
While a sudden loss of iPhone cellular service can seem dire, the problem can often be quickly resolved through some basic user-level troubleshooting. Let’s examine potential causes of no service issues and proven steps to get your iPhone 11 cellular data working reliably again.
Why Did My iPhone 11 Lose Cellular Service?
Losing signal from cellular network is inevitable due to various reasons, from environmental factors to software and hardware issues.
To give some clues on how to deal this problem, we’ve outlined some common reasons your iPhone 11 may report no service. Consider ruling each of these out to stabilize cellular connectivity on your iOS device:
- Airplane mode accidentally toggled on
- Outdated carrier settings needing refresh
- SIM card dislodged or faulty needing reinsertion
- Network connectivity failure due to outage
- Hardware problem like damaged cellular antenna
Identifying the specific trigger points us to the right solution. Let’s fix it!
Troubleshooting No Cell Service on iPhone 11
As mentioned earlier, the problem could be attributed to a software or hardware problem. Thus, troubleshooting both aspects of your phone is imperative. Feel free to try these outlined procedures to restore cellular data when you see no service:
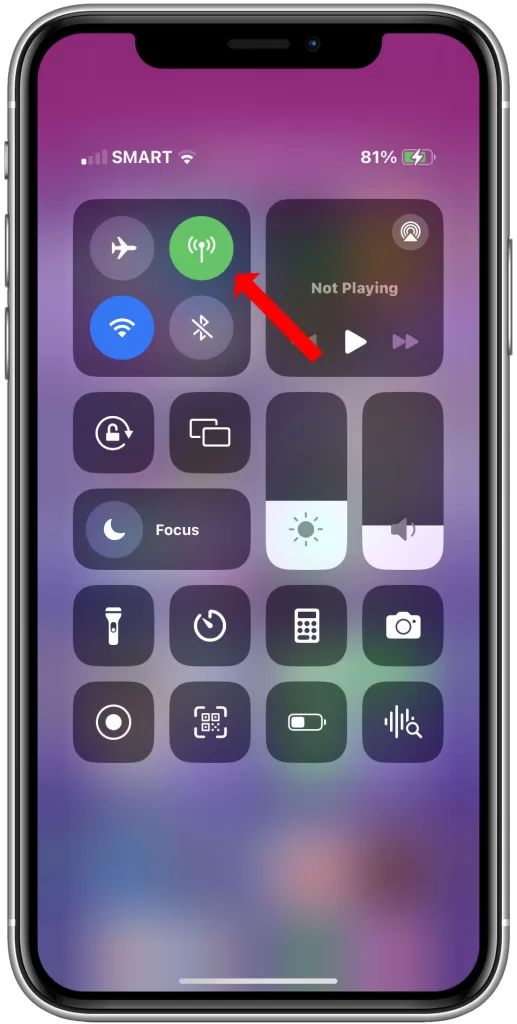
First solution: Turn cellular data off and then on again.
Random network errors that might have halted cellular data functions are usually remedied by turning cellular data off and then back on. So if you haven’t already, consider this among the first possible solutions to try. Here’s how:
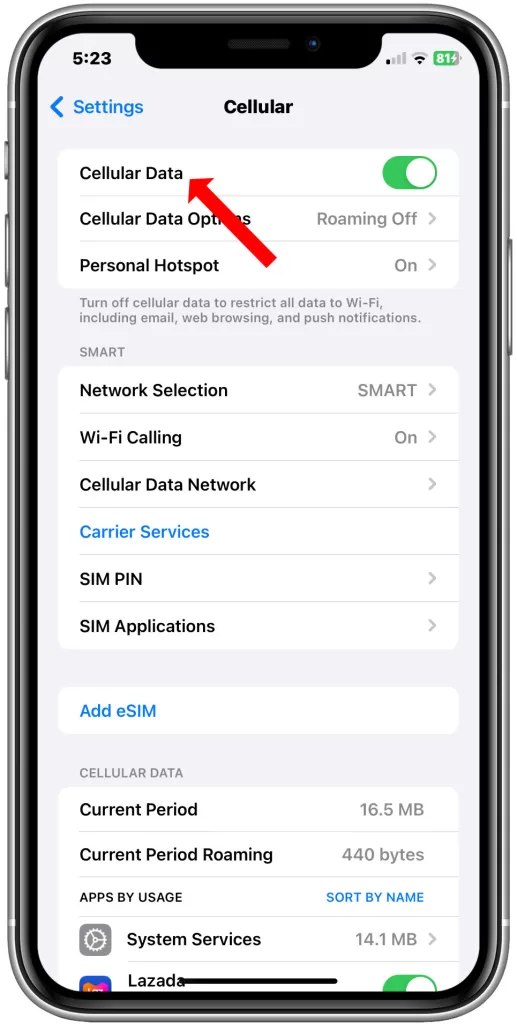
- Go to Settings-> Cellular menu. Then toggle the Cellular Data switch to turn the feature off and on.
- Alternatively, you can swipe open the Control Center of your iPhone and then tap the Cellular Data icon to turn the feature on or off.
A green icon is indication that Cellular Data is ON. Otherwise, the icon appears gray. In this case, it should be green.
Second solution: Enable Airplane Mode shortly and then disable again.
This old trick has been used to deal with various types of problems affecting wireless Internet problems and other network-related issues. Performing this trick works by giving Wi-Fi functions a quick restart and thereby eliminates minor glitches. Here’s how it works:
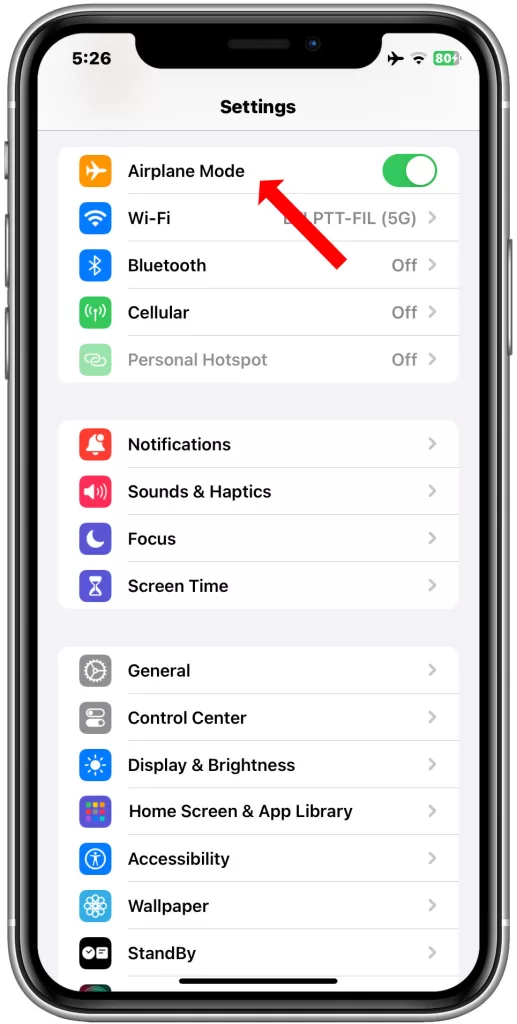
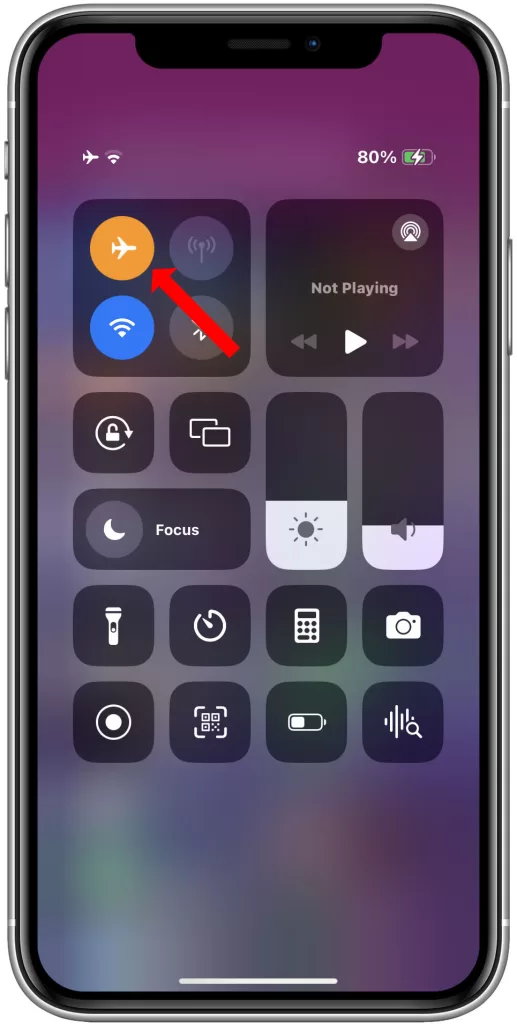
- Tap Settings from the Home screen.
- Select Airplane Mode from the menu options.
- Then tap the Airplane mode switch to enable it. Doing so disables all wireless features of the phone including Bluetooth, Wi-Fi and Cellular Data.
- Restart/soft reset your iPhone 11 while Airplane mode is enabled.
- Then go back to Settings-> Airplane mode menu and toggle the switch to disable Airplane mode again.
All wireless features are now active again. Try heading back to your iPhone settings and then see if cellular data is already active and working as intended.
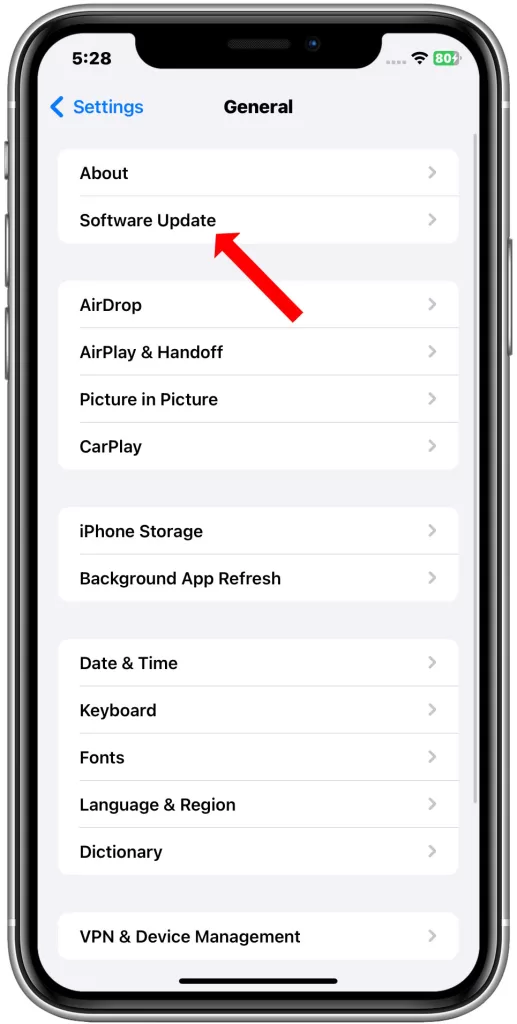
Third solution: Install new carrier updates and iOS update.
Bugs and malware are also among the usual culprits and therefore must be rid off. This is when updates play a vital role. Aside from bringing in new features, software updates also offer fix patches to get rid of any existing bugs and malwares that are inflicting troubles to your phone’s wireless functions.
- To check for new carrier settings update on your iPhone 11, go to Settings-> General-> About menu. Stay on this menu for a few seconds and wait for the update message to appear.
- If a new carrier update is up for grabs, then it will be indicated on the message prompt. Otherwise, you won’t see any message prompt at all.
Aside from carrier updates, installing the latest iOS version available for your iPhone also does the same positive outcome when dealing with bug-inflicted network errors.
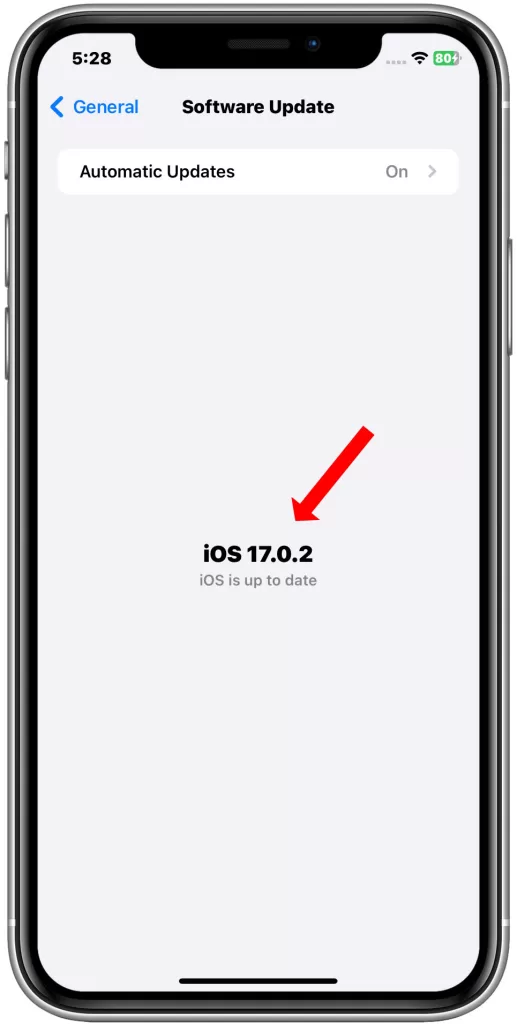
- To check for new software update on your iPhone 11, go to Settings-> General-> Software Update menu.
Again, you’ll see an update notification if a new iOS version is available. Before downloading the update, be sure to back up important files for safekeeping. Then follow the onscreen prompts to download and install new update on your iPhone.
After installing updates, reboot your iPhone to apply the recent system changes and then try to see if that fixes the problem with your iPhone’s cellular data functions.
Fourth solution: Reset network settings.
Network-related issues in general are usually remedied by resetting the network settings. This reset works by wiping all current network configurations and server settings then restores the default functions and network options on the phone. Bluetooth and Wi-Fi connections are likewise deleted in the process, so make sure to reconnect afterwards.
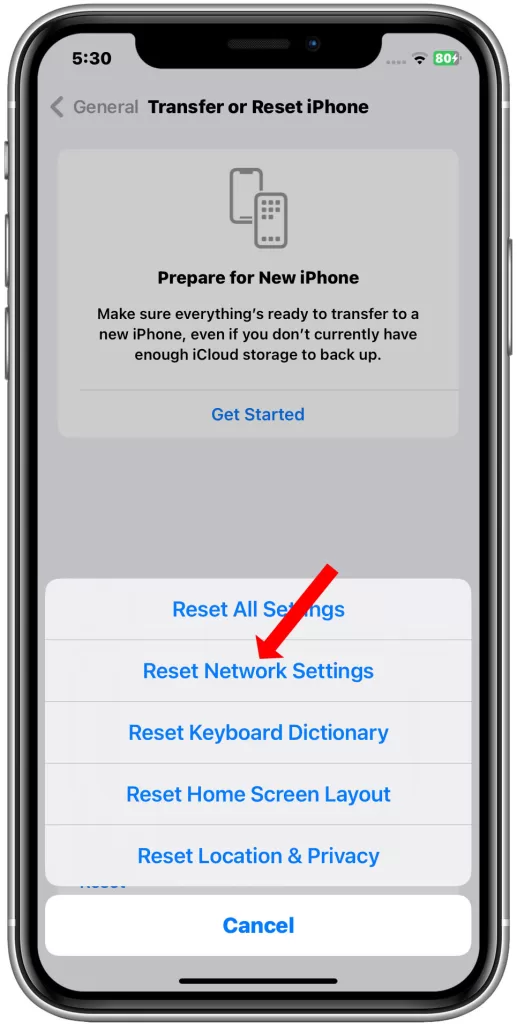
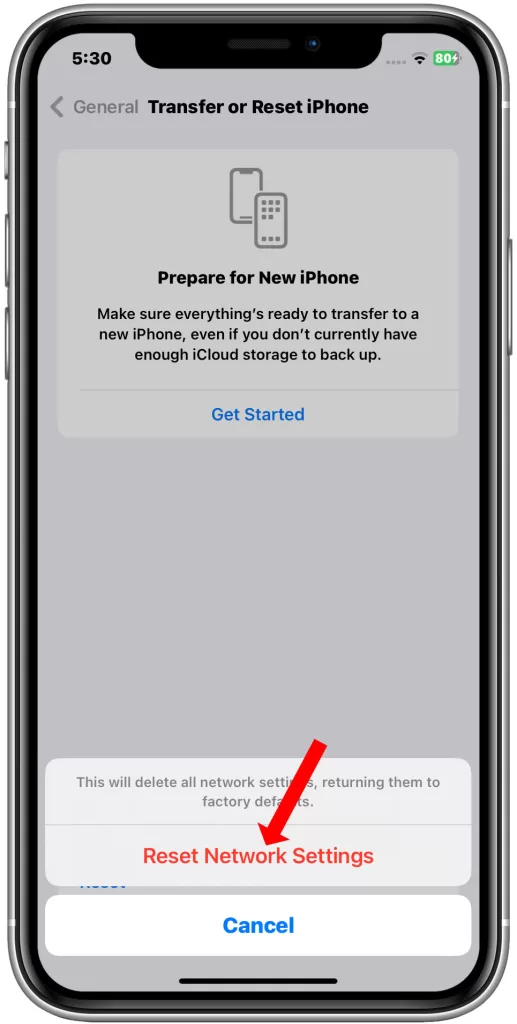
If you wish to give it a try, then here’s how to reset network settings on your iPhone 11:
- Open the Settings app from Home.
- Tap General.
- Tap Transfer or Reset iPhone.
- Scroll to and tap Reset.
- Select the option to Reset network settings.
- Enter your device passcode to continue.
- Then tap the option to network settings reset.
After the reset, your iPhone restarts automatically and then loads up with the default network options and original network configuration.
To get back online, set up and reconnect to your Wi-Fi network like the first time you do and do the same with Bluetooth and cellular data features.
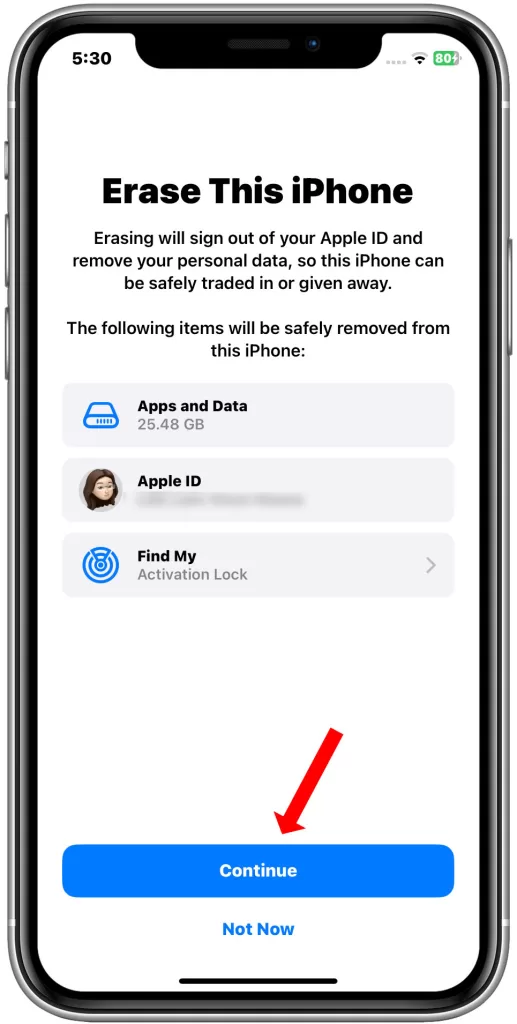
Fifth solution: Factory reset your iPhone 11.
Among the last options and potential solutions you may consider doing if the problem persists after applying prior methods would be a factory reset or master reset. This will wipe everything from your device including your saved contacts, downloaded apps, customized settings, personal information and other added contents on the phone.
Any complex system issues including those affecting cellular data will have a higher chance of being resolved in the process.
Before you start with the reset, back up all your important files to iCloud or your computer drive through iTunes so you can just recover them later. Once you’re all set, you can carry out the quicker way to factory reset an iPhone through settings menu.
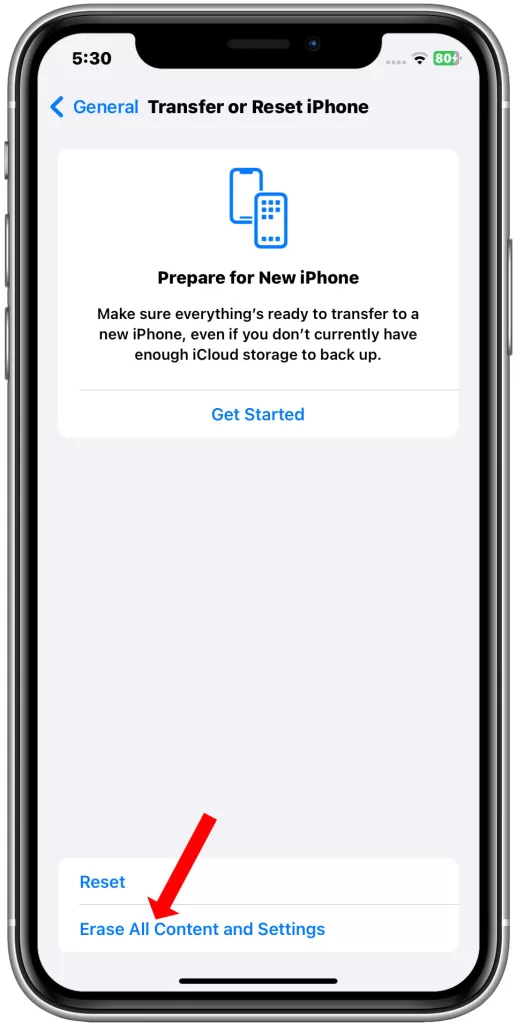
Here’s how:
- From the Home screen, tap on Settings.
- Tap General.
- Scroll to and tap Reset.
- Select the option to Erase all content and settings.
- Enter your device passcode to continue.
- Then tap the option to confirm factory reset.
Follow the rest of the onscreen instructions to complete the reset. When the reset is finished, your iPhone reboots by itself. As soon as it boots up, you can proceed with the initial setup process and set up your iPhone as new.
Most software issues including fatal system errors are resolved by performing a factory reset, hence cellular data must already be working properly on your iPhone by then. If it’s still not, then you the problem could be on your network provider’s end. At this point, escalating the problem would be the next option.
Preventing Future Cellular Data Problems
With concerted effort, your bars should reappear unless cellular network outage or technical difficulties are transpiring. Proactive measures like these can prevent many problems. To reduce the chance of repeat cellular loss on your iPhone 11:
- Be cautious of Airplane mode to avoid accidental toggling
- Keep carrier settings updated whenever new versions are released
- Use phone case to prevent SIM card from dislodging
- Monitor signal strength using the status bar icon
When your iPhone 11 reports no cellular service, it can seem bleak but methodically verifying settings, hardware state, and network configurations nearly always resolves the problem. With some diligent troubleshooting, you’ll soon be happily surfing, streaming, and using data on the go again.
And that’s all there is to troubleshooting cellular data not working on iPhone 11. Hope this helps!