How To Wipe Cache Partition on Samsung Galaxy S22 (OneUI 4.1)
This post will walk you through deleting all temporary data storage from the system cache on the latest Samsung Galaxy S22 devices. Here’s a quick guide on how to wipe cache partition on Samsung Galaxy S22 and other Galaxy phones running on the same OneUI version.
OneUI 4.1 Cache Partition Overview
In Android phones, system cache is emptied using a wipe cache partition command. Performing a wipe cache partition works by deleting all residual data logs from the system cache including any corrupted temporary files that may be causing problems to the device.
This process does not affect any personal information, apps and settings so there’s no need to back up user data. What it deletes are only temporary junk files from the phone’s internal memory.
And here’s how to easily wipe cache partition on the newest Samsung Galaxy S22 series.
Steps to Wipe Cache Partition on Samsung Galaxy S22
These steps are also applicable when wiping the cache partition on other Samsung Galaxy phones including the Galaxy S22+, Galaxy S22 Ultra and prior models running in OneUI 4.1.
Actual screens and menu items may vary between device models and wireless carriers so there may be some slight differences on every device’s user interface.
Just follow these steps whenever you’re all set.
Step 1: Power off your device completely.

Step 2: While the phone is turned off, simultaneously press and hold the Volume Down and Power/Side buttons for about 10 seconds.
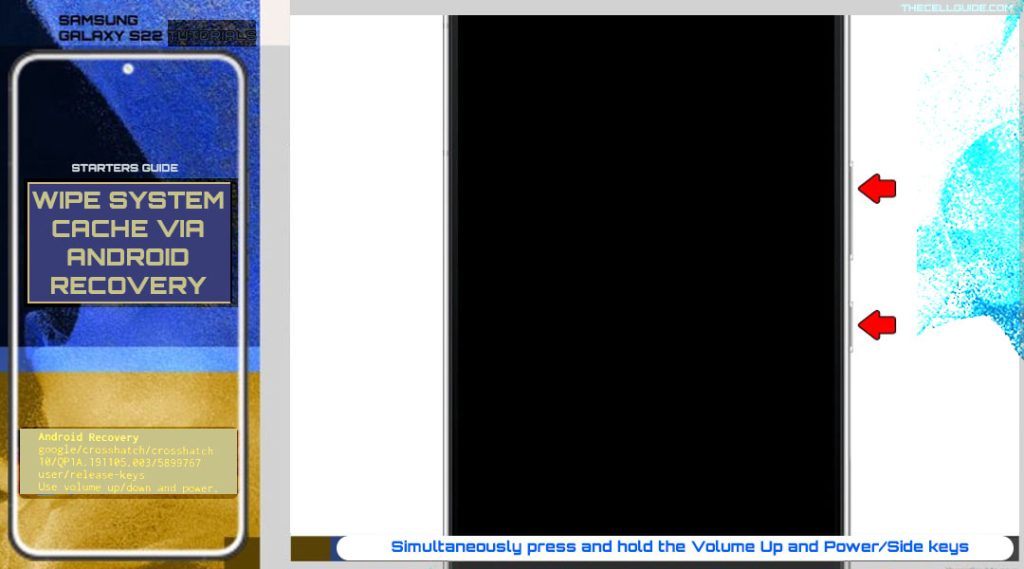
Step 3: When you feel a slight vibration and the Samsung logo appears on the screen, release both buttons. Wait for the phone to enter the Android Recovery mode.

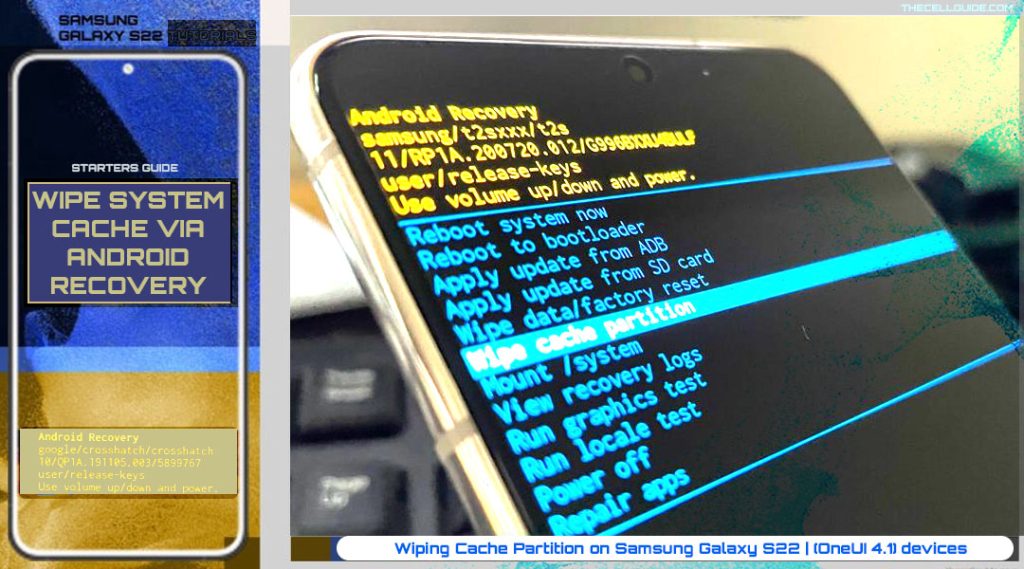
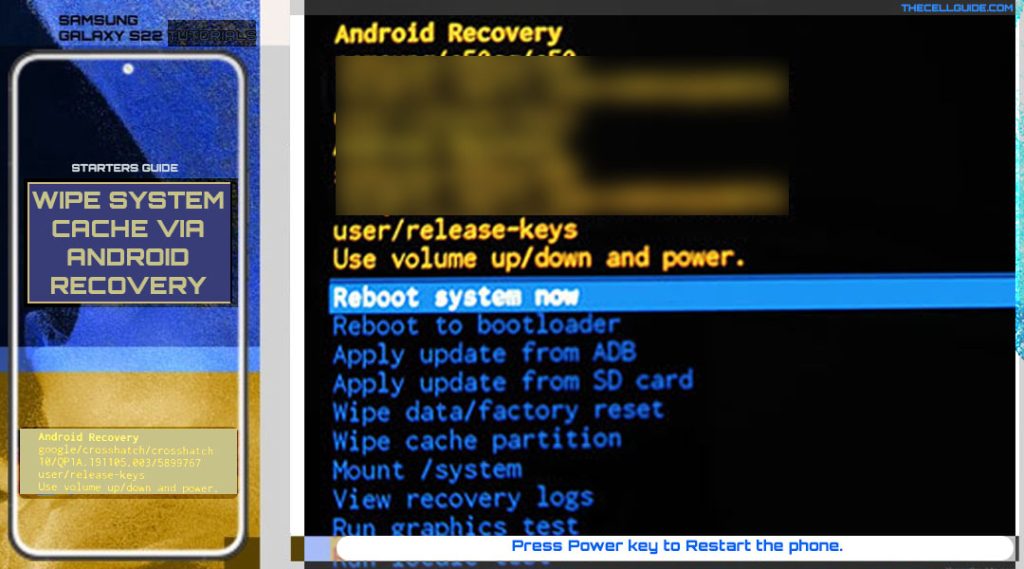
While in the Android recovery mode, you will see an all-text menu with a list of different options, also referred to as the Android Recovery menu options.
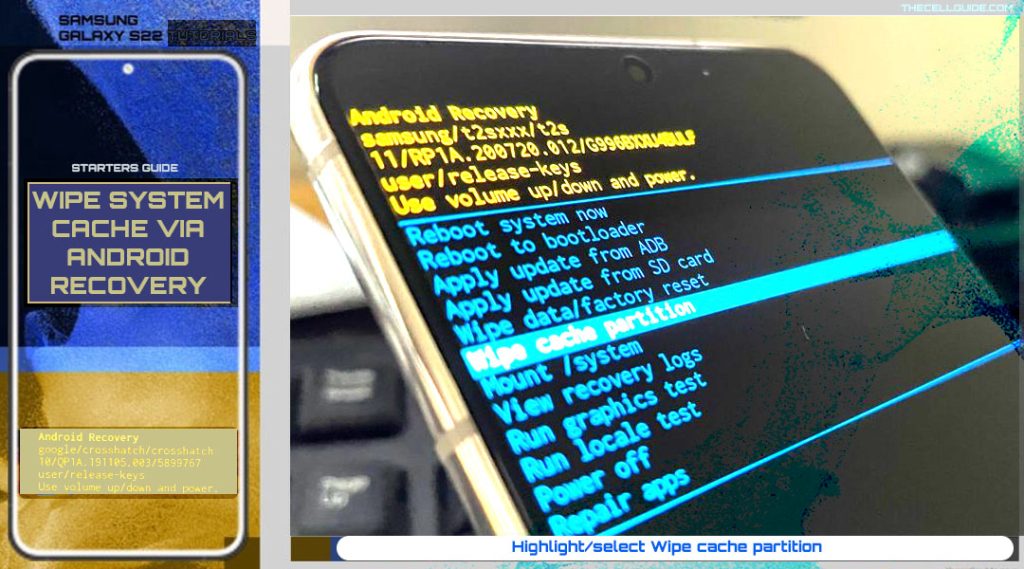
Step 4: To navigate through and highlight any of these commands, you will need to use the hardware keys, particularly the Volume keys and then press the Power button to confirm selection. That said, press the Volume Down/Up key to highlight ‘Wipe cache partition’ from the given options.
Important note:
- Be sure to highlight the wipe cache partition and not the Wipe data/factory reset. Highlighting the latter will prompt the device to execute a factory reset and wipe everything from your phone.
Step 5: After highlighting the wipe cache partition, tap the Power key to confirm selection.
Step 6: On the next screen, press the Volume Down key to select/highlight ‘Yes’ and then press the Power key to confirm selection.
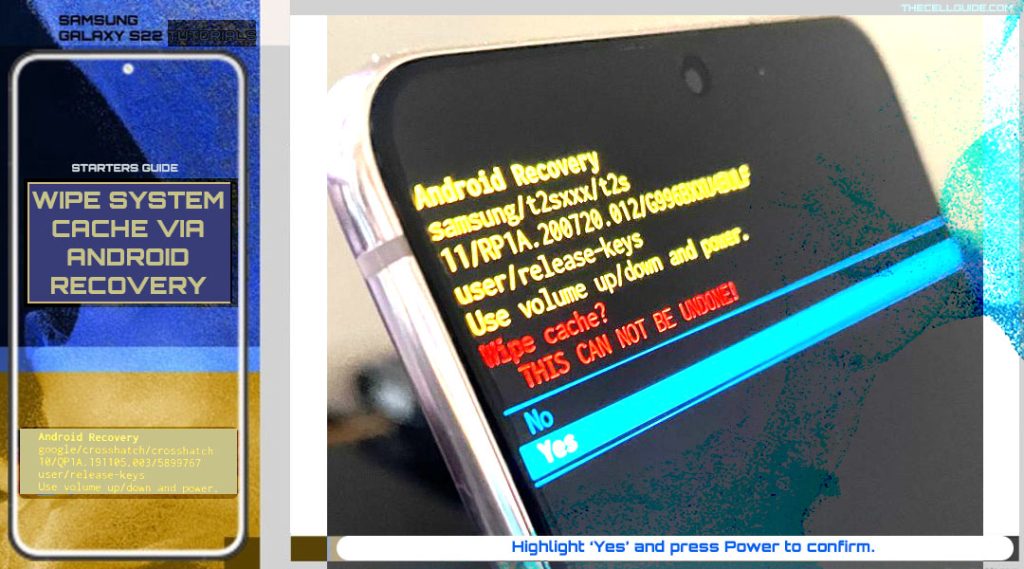
The phone then starts deleting all temporary files. The entire process only takes a few seconds.
Step 7: After wiping the cache partition, the Android recovery main screen loads up with the ‘Reboot system now’ option selected/highlighted. Just press the Power key to confirm system reboot.
Your phone will then restart, exit recovery mode and load back to normal mode. Restarting after wiping cache partition usually takes longer than the typical reboot so just wait patiently until the phone boots up. By then, you should notice that your device is performing a lot smoother and faster as temporary cache files are already deleted.
When to Wipe Cache Partition?
Apps normally store temporary information to speed things up when processing the same requests the next time they’re used. This information is kept in a dedicated directory called cache.
In mobile devices like smartphones, there’s a separate storage for system cache and app cache. There’s also a so-called browser cache for storing temporary online data.
While caching this information benefits in terms of loading speed, over time, a bigger portion of the internal storage will be utilized for these cached files. When this happens, there’s a higher chance for performance issues to arise.
That being said, clearing apps and system cache is recommended from time to time. Not only that doing so frees up some storage space, it also prevents performance-related issues to occur on the device.
And that’s all about wiping the cache partition on the new Samsung Galaxy S22 other recent Galaxy devices.
Hope this helps!
Please check out our YouTube channelto view more tutorial and troubleshooting videos for popular iOS and Android devices.