Wondering how to wipe cache partition on your new Samsung Galaxy smartphone? If so, then you can refer to the outlined steps below. Here’s a step-by-step guide for you to access recovery mode and wipe cache partition on Galaxy S20.
Android smartphones do have a dedicated directory that stores temporary system data and it’s called system cache partition. The type of data stored in the system cache partition are mostly system updates. While it is supposed to let the system access apps more quickly and efficiently, there are many factors that can get this system partition cluttered. When this happens, the device can become sluggish or symptomatic. To prevent this from happening, periodic cache clearing is recommended. Doing so can help make the system run flawlessly and more smoothly.
Clearing the cache partition on an Android phone typically denotes entering recovery mode. And to do so, you will need to execute specific shortcut key combinations. The key combos to access recovery mode vary between devices. The method I demonstrate in this post is applicable to the new Samsung Galaxy S20. Read on to find out how it’s done.
Steps to Wipe Cache Partition on a Galaxy S20
Time Needed : 10 minutes
The following steps and screenshots depict the standard process of wiping cache partition on the new Samsung Galaxy S20 handset. Unlike a master reset, wiping the cache partition does not delete your personal information, so it’s harmless. Do this to resolve system issues before opting for a master reset.
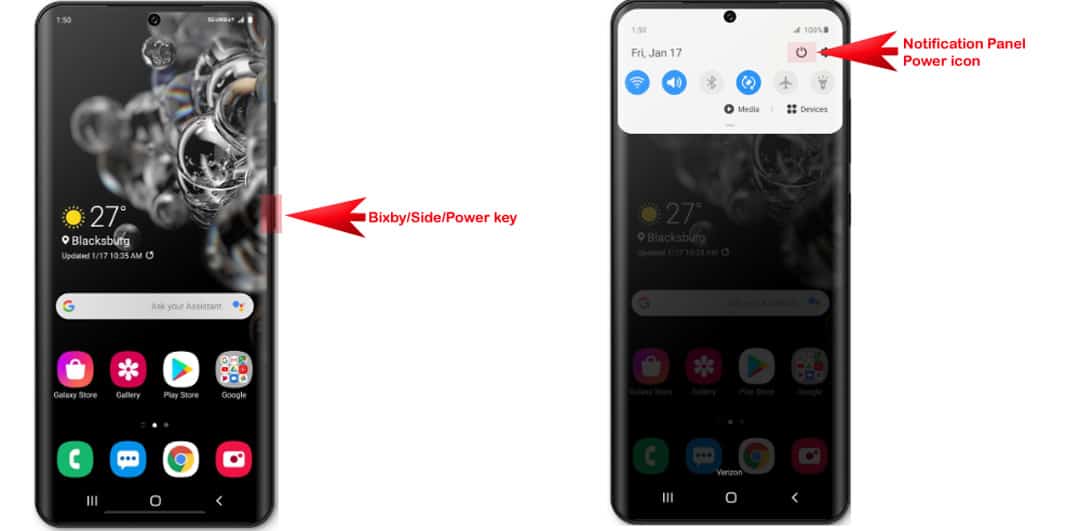
First, turn your phone off by pressing and holding the Side button until the device powers down. Alternatively, you can use the shutdown option or power icon from the notification panel on your device.
Turning the device off before entering Android recovery is recommended to prevent any possible system flaws.

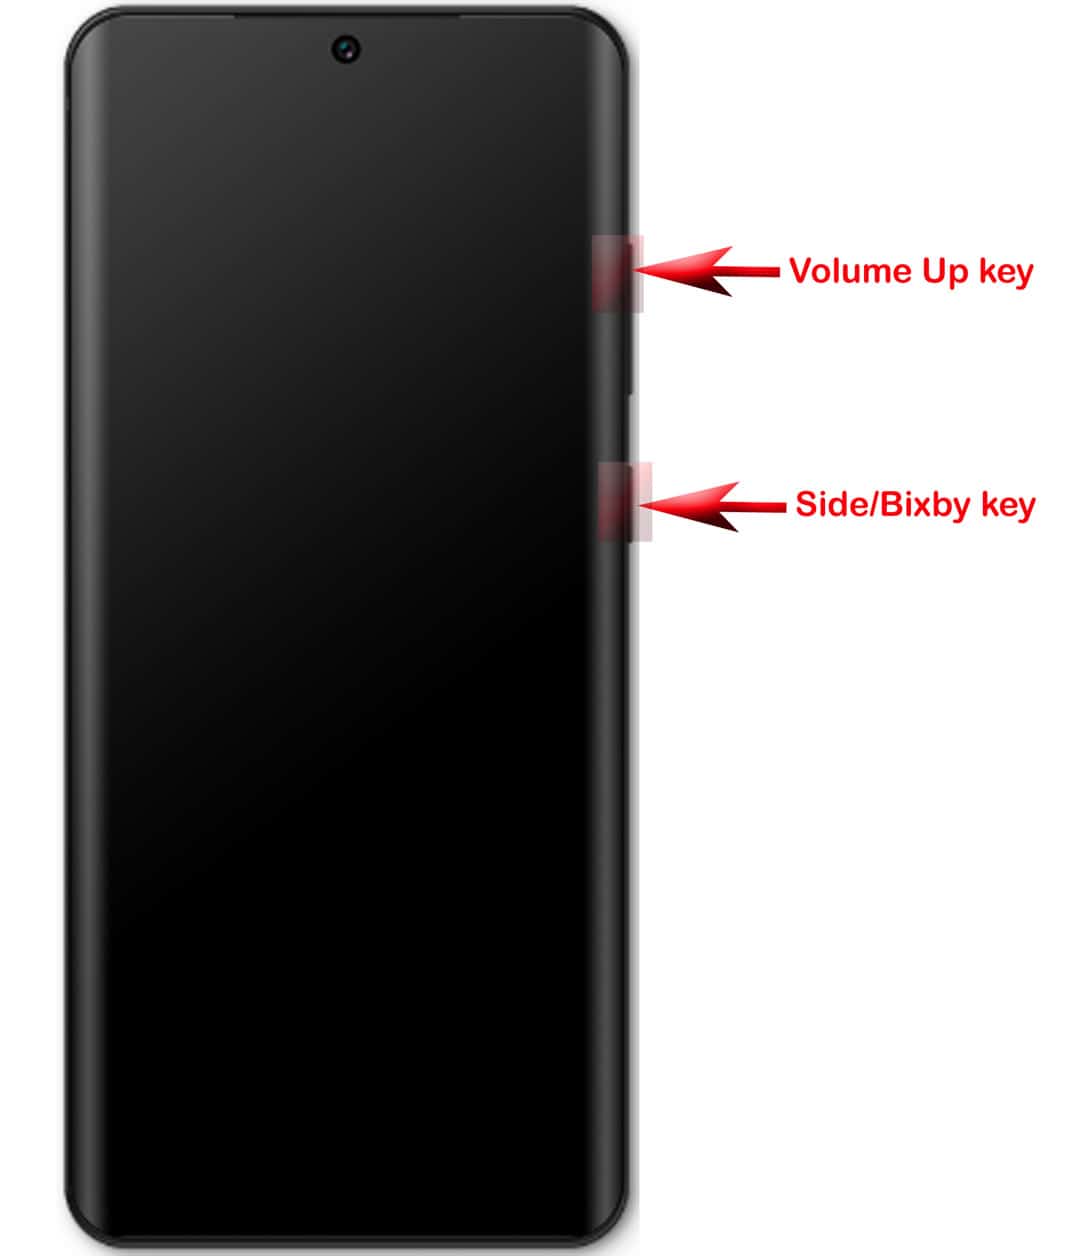
While the phone is turned off, simultaneously press and hold the Volume Up key and the Bixby/Power key for a few seconds and then release both keys when the Android logo appears.
When the Android logo shows up, it means that your phone has entered recovery mode and is preparing to load up major system commands.
You will then see an “Installing system update” message prompting shortly before the Android Recovery menu options are displayed.
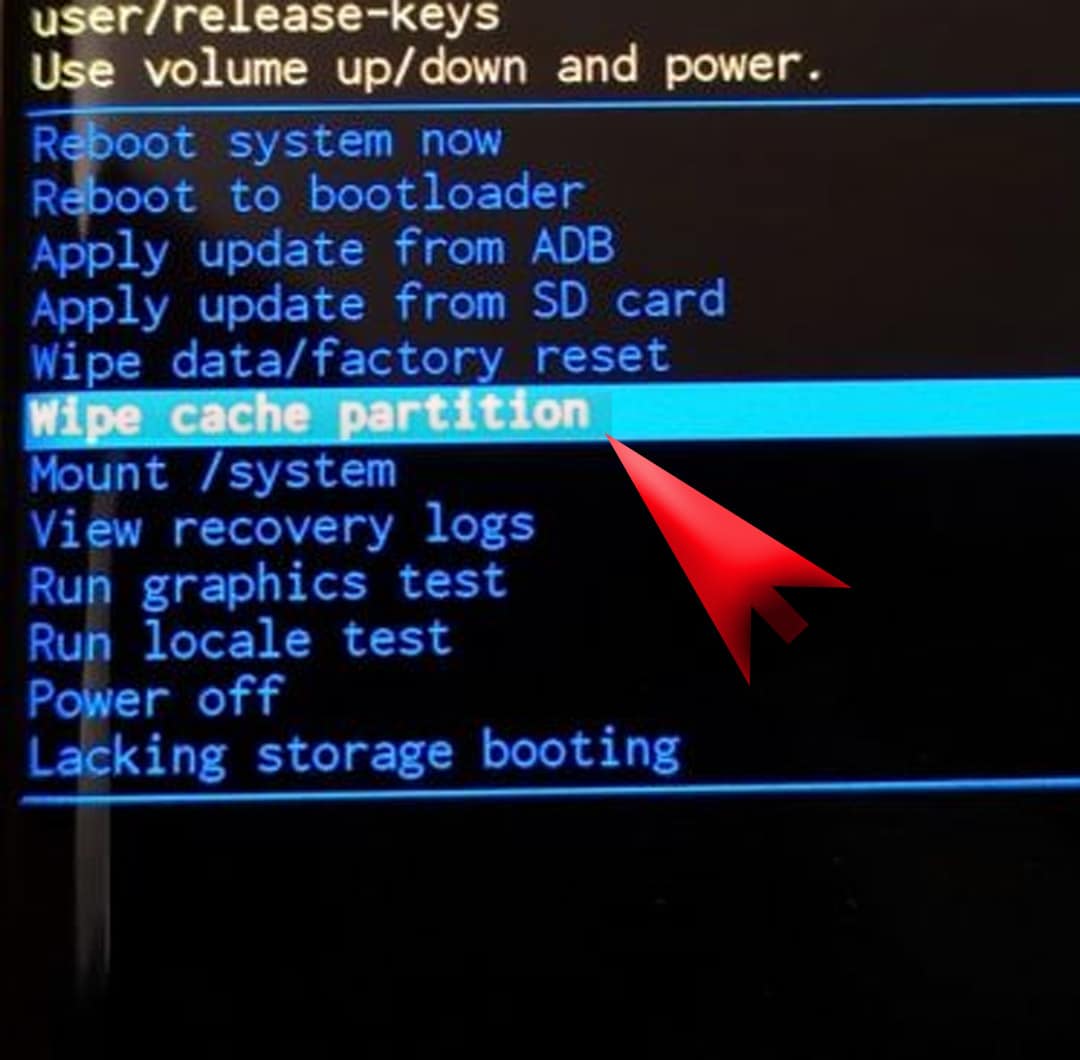
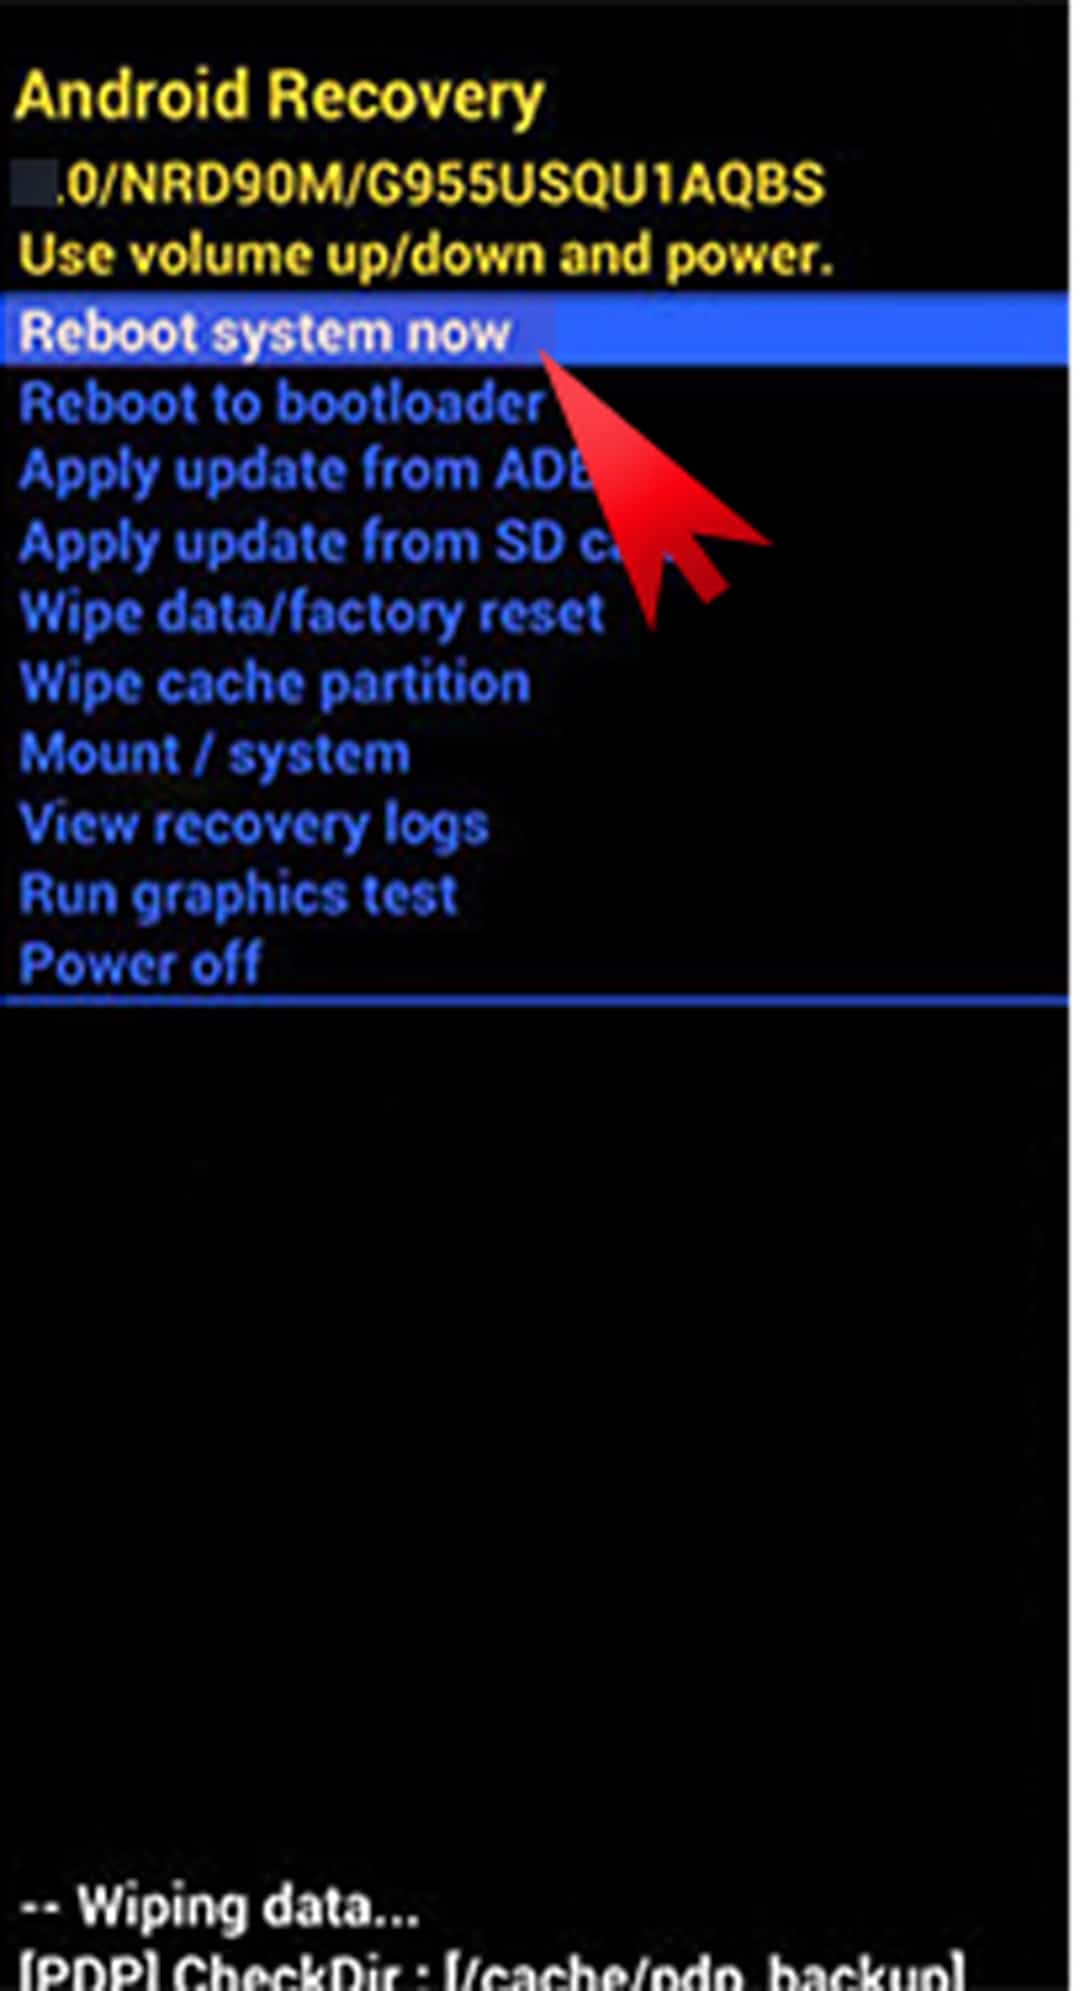
From the Android Recovery menu, you'll see a list of command lines. And to navigate through these commands, you will need to use the hardware buttons on your device.

To scroll to and highlight Wipe cache partition, press the Volume Down key several times until you see the wipe cache partition command line is highlighted or selected. Then, press the Bixby or Power key to confirm.
A selected command appears to be highlighted hence, you should see that transpiring on the Wipe Cache Partition command line.

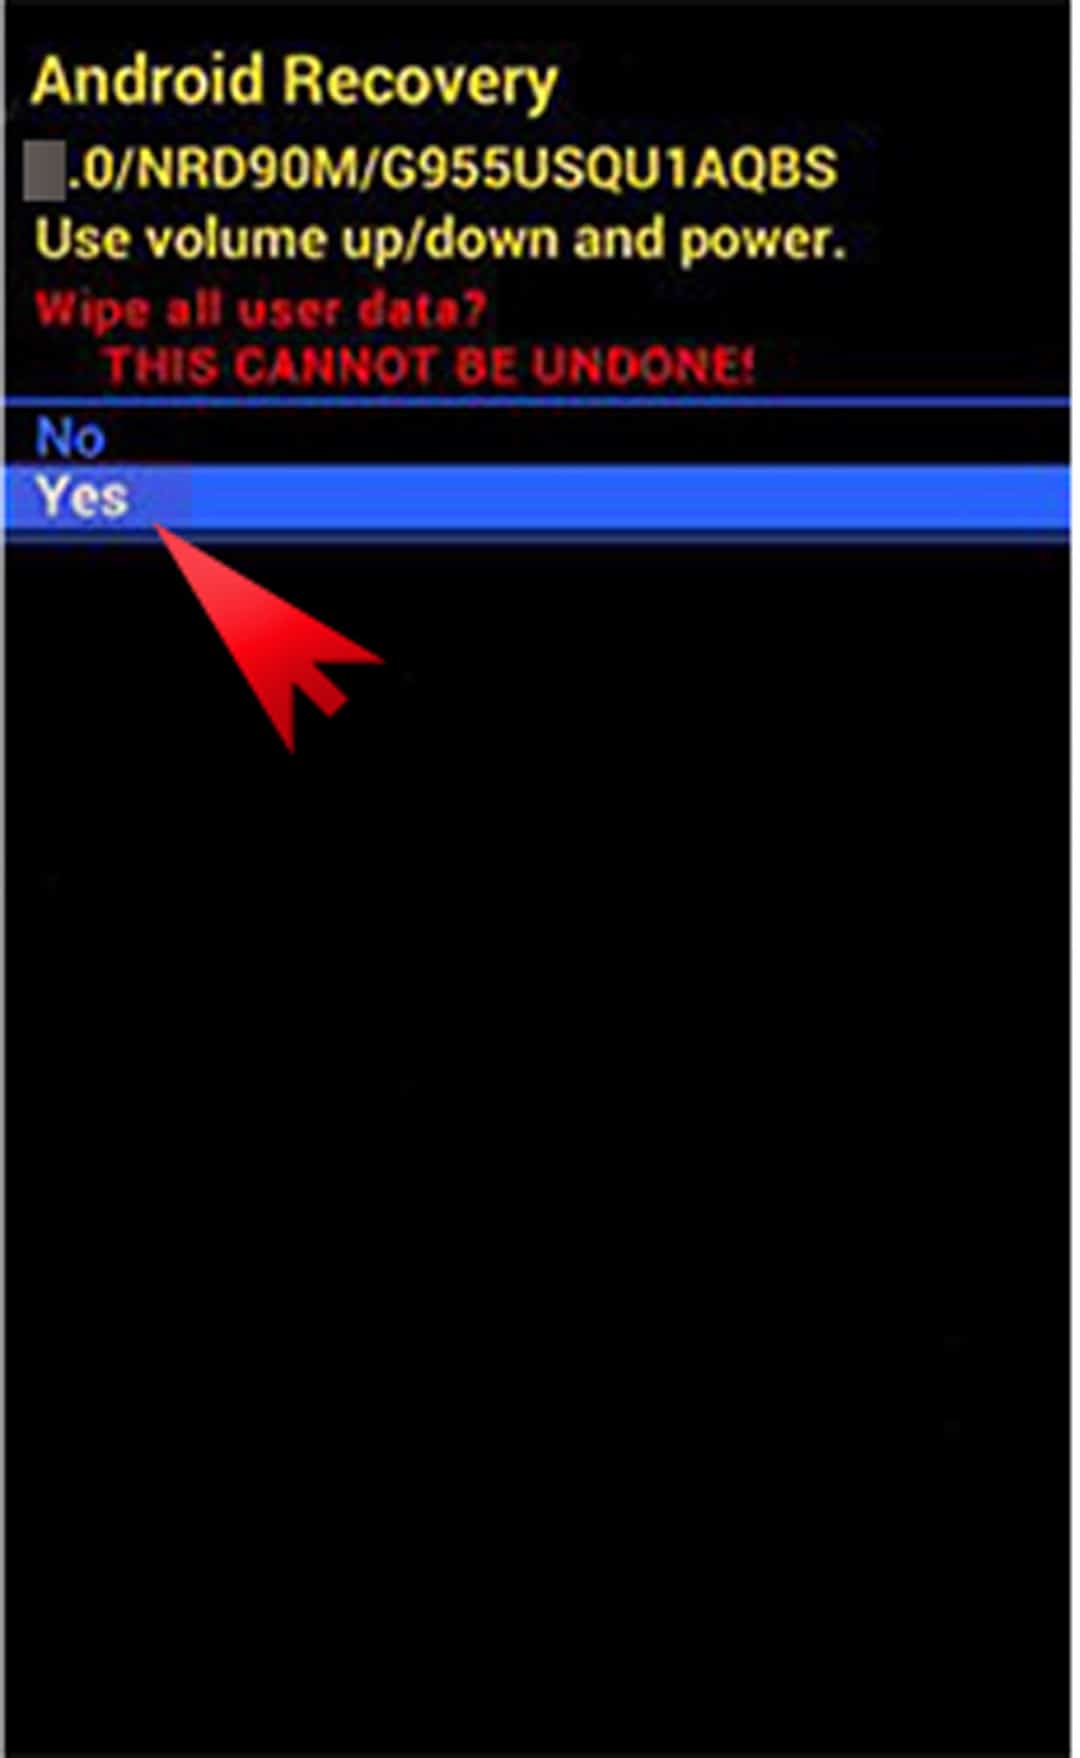
On the next screen, you'll see another set of command lines. Press the Volume Down key to scroll to and highlight Yes then press the Bixby/Power key to confirm selection.
In a normal state, this is equivalent to a message prompt asking you to continue.
The phone will then instigate wiping the cache partition. The entire process could take longer depending on the amount of temporary cached files in the system directory.

When the process is finished, you should see the Reboot system now command line is highlighted. Just press the Bixby/Power key to proceed.
This commands your device to reboot.

Tools
- Android 10, One UI 2.0
Materials
- Galaxy S20
And that’s how you do it! You can repeat the same steps the next time you think wiping cache partition on your device is necessary.
As recommended, wiping the cache partition on the phone should be done at least once a month. This is also equivalent to at least one reboot on the device per month. However, wiping the cache partition may also come in handy when dealing with some unexpected system-related issues that may occur on your device.
Among the problems that require wiping the cache partition are the dreaded black screen of death, frequent system crashes, random restarts and other atypical behaviour on apps or the device itself.
Wiping cache partition does not affect any saved information on the phone and thus, it doesn’t result in permanent data loss. Nonetheless, it’s still recommended to keep a backup of all critical information on the phone, for safekeeping.
And that covers everything in this tutorial. Please keep posted for more comprehensive guides, tips, and tricks on how to make the most of your Samsung Galaxy S20 and other new Galaxy devices.
Also visit our YouTube Channel to view more smartphone video tutorials and troubleshooting guides.
ALSO READ: How to Set Up and Use Biometric security on Galaxy S20
