A greyed-out WiFi button on your iPhone means that the feature is disabled and that your device wouldn’t be able to connect to WiFi unless the button is turned on or enabled. In normal circumstances, toggling the WiFi switch should enable the feature and allows your device to connect to your WiFi network and use online services. But some iPhone XR owners were caught in a bizarre instance wherein the WiFi button remains greyed no matter how many times they toggled it.
If by any chance, you’ve landed into this post while searching for possible solutions to a similar issue on the same Apple device, then this post may be able to help you out. Read on to learn what to do if your iPhone XR WiFi button is greyed out.
Before anything else, if you are looking for a solution to a different problem, then drop in on our iPhone XR Help Guides page for we have already solved some of the most common problems with this device. Try to find issues that are similar to yours and feel free to use our workarounds and solutions.
Troubleshooting iPhone XR with WiFi button that’s greyed out
Before performing any of the following procedures, reboot your iPhone. Doing so can help eliminate minor system errors that might have caused the WiFi system to glitch and thus, you’re facing this symptom. If the WiFi button is still greyed out after the reset, then you can start ruling out other possible culprits.
First solution: Check Airplane mode and make sure it is disabled.
Your iPhone’s wireless radios including WiFi will be disabled the moment the Airplane mode switch is turned on. So before doing some complex troubleshooting procedures, start working on the Airplane mode toggle. Check and ensure that the Airplane mode is turned OFF. Here’s how:
- Go to Settings from your Home screen.
- Select Airplane Mode menu.
- Toggle the switch to turn off the feature. Otherwise, tap the switch to enable the Airplane Mode. Doing so will temporarily disconnect your wireless communications including WiFi.
- While the Airplane Mode is enabled, reboot (soft reset) your iPhone.
- Then head back to Settings-> Airplane Mode menu and toggle the switch to turn the feature off again.
It is also possible that even if the Airplane Mode is disabled, your phone is left on the Airplane Mode state, so you need to toggle the feature to refresh your phone’s system.
Second solution: Reset network settings on your iPhone XR.
Network-related issues can also be the underlying cause of the WiFi button being greyed out and interfere with the normal WiFi activation routine. To eliminate such errors, performing a network reset can help. This reset clears out all your current network settings and configurations. Saved WiFi network and Bluetooth connections are likewise deleted in the process. Any errors associated to network configuration errors are also cleared out along with the transpiring symptoms. If you wish to give it a shot, then here’s how a network settings reset is done on your iPhone XR:
- From the Home screen, go to Settings.
- Select General.
- Scroll down to and tap on Reset.
- Then select Reset network settings from the options.
- Enter your device passcode if prompted to continue.
- Tap Reset network settings again to confirm the reset.
Your phone will reboot automatically after the reset. Given that this reset deletes your current network configurations, setting up WiFi should be the next thing you should do. And this also the time when you’d see if the WiFi button is already working as intended. If the WiFi button remains greyed no matter how many taps you’ve made, then proceed to the next possible workarounds to eliminate other culprits.
ALSO READ: Fix an iPhone XR that cannot send or receive picture messages or MMS
Third solution: Reset all settings on your iPhone XR.
Many people are fond of customizing their phone settings according to their preferences without realizing that this could possibly result in some errors and problems. To rule out invalid customizations from the possible causes, resetting all settings on your iPhone XR is recommended. This reset deletes all customized settings on the phone and then restores the original values and options. Any errors and symptoms associated to invalid settings are therefore obliterated. There’s no need to back up files beforehand since this reset does not affect any saved information on the internal memory of your device. Hence you can go ahead and start performing this reset through these steps:
- Open the Settings app from your Home screen.
- Select General.
- Scroll down to and tap on Reset.
- Then select Reset all settings option.
- When prompted, enter your device passcode to continue.
- Then tap Reset all settings again to confirm the reset.
After the reset, your phone will boot up automatically and reloads the default settings. Then proceed to enable necessary features including WiFi and check if you can now toggle the WiFi switch or button.
Fourth solution: Update the software of your iOS to the latest version via iTunes.
Upgrading your iPhone software to the latest version available can also help fix this WiFi issue if system bugs and fatal errors are to blame. Software updates rolled out by Apple for iOS devices provide fix patches that are designed to eliminate bug-inflicted errors including the WiFi button glitch.
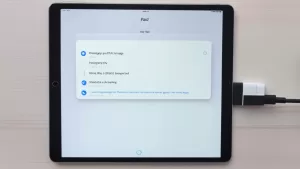
But since your iPhone isn’t connected to WiFi given that the WiFi button is greyed out, updating via over-the-air won’t be possible. As an alternative solution, you can use iTunes to manually check for and download any available iOS update for your iPhone. To get started, you will need to secure a computer. A Windows PC or Mac will do for as long as it has the latest version of iTunes app in it. Once your equipment is ready, proceed to these steps:
- Launch the iTunes app from your computer.
- Connect your iPhone XR to the computer using the supplied USB cable or Lightning cable.
- Allow iTunes to check for available software updates for your iPhone. Then tap Download and Update when prompted with the new iOS version available.
- Follow the onscreen instructions to complete the update process.
If your phone doesn’t automatically reboot after the update installed, then you should trigger it to restart (soft reset) to make sure that all the latest system changes are properly applied and likewise to refresh iOS apps and system services. After restarting, head over onto your iPhone Settings-> WiFi menu to see if the WiFi button is still greyed out or not any more.
ALSO READ: How to fix an iPhone XR that’s not ringing for incoming calls
Fifth solution: Perform a factory reset on your iPhone XR.
Restoring your iPhone to its factory default settings would be your last resort if none of the aforementioned options is able to solve the problem. The WiFi button may remain greyed out due to some complex system errors and tough bugs that require full system wipe out and reset. But before you factory reset your iPhone, be sure to back up all your critical files to iCloud or iTunes because this reset will cause permanent data loss. You can back up files from your iPhone XR to iCloud or to iTunes depending on which factory reset method you’d want to use. A faster way is through your iPhone XR settings, so you can back up your iPhone files to iCloud and then proceed to these steps:
- From the Home screen, open the Settings app.
- Select General.
- Scroll down to and tap on Reset.
- Select Erase all content and settings option to master/factory reset your iPhone XR.
- Enter your device passcode when prompted to continue.
- Then tap the option to confirm the master/factory reset.
Your phone will restart by itself after the master reset. Once it is back on, the factory default settings are loaded. Follow the onscreen prompts or start-up wizard to set up your phone as new again.
Alternatively, you can perform a factory reset on your iPhone via iTunes. To get started, you need to have a computer with the latest version of iTunes installed. You also need to have a stable internet connection to get this done. Here is how:
- Launch the iTunes app from your computer.
- Connect your iPhone XR to the computer using the supplied USB cable or Lightning cable.
- Select Trust this Computer when prompted to continue.
- Then select your iPhone’s name once it shows up in iTunes.
- Navigate the Summary section located on the left side of your iTunes screen.
- Then click on Restore [iPhone name] button to initiate the iOS reset.
- Click on the Restore button again to confirm. Doing so will prompt iTunes to erase your device then install the latest software version.
The process may take a couple of minutes to be completed. Once the factory reset is done, your iPhone will reboot automatically. Afterwards, proceed to the initial setup process and set up your iPhone XR as new to use it again as you normally do. Don’t forget if the problem is gone after the full system reset.
If a factory reset didn’t solve the problem, then it must be due to some fatal system errors that require more advanced solutions like a recovery mode restore or DFU mode restore. If you wish to proceed with either restore options, you can refer to a step-by-step guide found on this site’s iPhone XR tutorials section. Just visit the XR troubleshooting page for more information.
Seek more help
There might be some more complex system errors that caused your iPhone XR’s WiFi button to be disabled or greyed out. If none of the given solutions is able to resolve the issue, then it’s time to seek further assistance from Apple Support. Contacting Apple Support will let them be notified about such problem affecting some iPhone XR devices and conduct further assessments on their end. If it’s found to be another iOS bug affecting the iPhone XR’s WiFi function, then that will compel Apple to develop a dedicated fix patch.
If you’re living in an area that’s close to an Apple-authorized service center, you can also take your iPhone there and ask a technician to inspect your device. Hardware damage like a damaged WiFi component may also be the underlying cause of the problem and thus that must be ruled out as well.
Connect with us
We are committed to helping our readers fix the problems with their phones as well as learn how to properly use their devices. So, if you have other issues, you may visit our Help Guides page so you can check by yourself the articles we’ve already published that contain solutions to common problems. Also, we do create videos to demonstrate how things are done on your phone. Visit our Youtube Channel and please subscribe to it. Thanks.
