The error “Message sending failed” that shows on your Samsung Galaxy Note 9 whenever you try to send a text message can be just a minor issue. In fact, I encountered several cases in the past wherein it’s caused by a minor glitch in either the system or the app itself. Needless to say, this problem can be fixed by doing some basic troubleshooting procedures.
In this post, I will walk you through in troubleshooting your Samsung Galaxy Note 9 that can’t be able to send text messages due to the “Message sending failed” error. So, if you’re one of the owners of this device and are currently being bugged by a similar issue, continue reading as this article may be able to help you one way or another.
On the other hand, if you are looking for a solution to a different problem, then drop in on our Note 9 Help Guides for we have already solved a lot of issues with this phone. Odds are that we already tackled your problem and written some articles on how to fix it. So, take time to browse the page and find issues that are similar with yours.
Going back to our troubleshooting, here are the things you should do if you’re getting this issue…
- Perform the forced restart procedure. It must be the first thing you must do as it could be just a minor glitch. Glitches happen all the time and while they seem like serious problems, they’re actually just minor issues with the firmware or with your applications. They can be fixed by a simple reboot but try doing the forced restart procedure as it’s way more effective. To do this, press and hold the volume down button and the power key simultaneously for 10 seconds or more. This will make the phone reboot like it normally does but your phone’s memory will be refreshed and it’s apps and services reloaded. After this, try sending a text message to your own number and if it still failed, then move on to the next procedure.
- Make sure your phone has good reception. When it comes to transmitting data–regardless whether it’s text or voice–your phone must be properly connected to the network and must be getting good signal. Communication is about connection; the better the connection, the better and faster the transmission. Look at the signal indicator on your phone’s notification bar and if you can see it has good signal, try to look for a plane icon as it’s also possible that flight mode is enabled. If you can see a plane icon beside the signal indicator, press and hold the power key until Power options appear. From there, you can disable flight mode. However, if your phone has good signal and no plane icon in sight, then try the next solution.
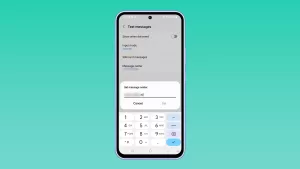
- Make sure it’s not about your account or carrier. Another possibility here is that your account might be the problem. If you’re on a postpaid plan, then you should call the tech support and ask about your account to know if it’s still in good standing. Not settling your balances could lead to this kind of problem. Also, while you’re on the phone with the rep, as him/her to walk you through in checking if your phone has the correct Message Center Number because it’s important for text messaging service. If you’re on prepaid, then make sure you have enough balance to send text messages. After verifying these things and you still can send text messages or if you’re still getting the same error message, then try the next procedure.
- Clear cache and data of the messaging app. We will now try to find out if the problem is caused by the app itself. Sometimes, corrupt caches and data files may lead to this kind of problem. In this case, we only have to reset the text messaging app you’re using. If you’re using the default then go to Settings > Apps and find Messages. Once you’re inside the apps settings page, you can clear its cache and data from there. After this, try to compose a text message and send it to your own number and if the problem remained, then you have to do the next procedure.
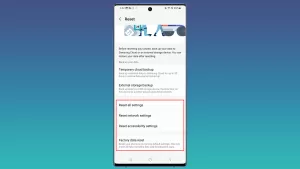
- Reset Network Settings. This will make sure the problem isn’t with your phone’s ability to connect to your carrier’s network. If this is actually just a network problem, then this procedure will fix it for sure. However, if the issue continues to bug you even after this, then you will have to backup your files and data and then perform the master reset.
How to reset network settings
- From the Home screen, swipe up on an empty spot to open the Apps tray.
- Tap Settings > General Management > Reset > Reset network settings.
- Tap RESET SETTINGS.
- If you have set up a PIN, enter it.
- Tap RESET SETTINGS. Once complete, a confirmation window will appear.
How to reset your Galaxy Note 9
- Turn off the device.
- Press and hold the Volume Up key and the Bixby key, then press and hold the Power key.
- When the green Android logo displays, release all keys (‘Installing system update’ will show for about 30 – 60 seconds before showing the Android system recovery menu options).
- Press the Volume down key several times to highlight ‘wipe data / factory reset’.
- Press Power button to select.
- Press the Volume down key until ‘Yes — delete all user data’ is highlighted.
- Press Power button to select and start the master reset.
- When the master reset is complete, ‘Reboot system now’ is highlighted.
- Press the Power key to restart the device.
I hope that this how-to post has helped you one way or another. Please help us spread the word by sharing this post to your friends or people who may also have similar problems. Thanks for reading!
RELATED POSTS:
- How to fix Samsung Galaxy Note 9 Black Screen of Death (BSoD) issue
- Samsung Galaxy Note 9 shows “Unfortunately, Settings has stopped” error
- Samsung Galaxy Note 9 has No service or weak signal issue
- How to replace Samsung Galaxy Note 9 dual rear-facing camera
- How to replace Samsung Galaxy Note 9 charging port flex and microphone
- Samsung Galaxy Note 9 shows ‘Message sending failed’ error

