Are you frustrated with your Amazfit T-Rex Pro not connecting to your phone? Don’t worry, you’re not alone. Many users have experienced this issue and struggled to find a solution. But fear not, we’re here to help you troubleshoot and fix the problem once and for all.
The Amazfit T-Rex Pro is a popular smartwatch that offers a range of features to help you track your fitness and stay connected. However, if you’re unable to pair it with your phone, you may not be able to take full advantage of its capabilities. So, why is your Amazfit T-Rex Pro not connecting to your phone? And, more importantly, what can you do to fix it?
In this article, we’ll dive into the most common connection issues faced by Amazfit T-Rex Pro users and provide you with step-by-step troubleshooting tips. Whether you’re using an iPhone or an Android device, we’ve got you covered. By the end, you’ll have the knowledge and tools to resolve the connection issue and enjoy a seamless experience with your Amazfit T-Rex Pro.
So, let’s get started and put an end to your Amazfit T-Rex Pro connection problems once and for all!
Key Takeaways:
- Having trouble connecting your Amazfit T-Rex Pro to your phone? You’re not alone.
- We’ll provide you with step-by-step troubleshooting tips to fix the connection issue.
- Both iOS and Android users will find solutions tailored to their devices.
- Don’t let connectivity issues hold you back from enjoying the features of your Amazfit T-Rex Pro.
- By following our troubleshooting tips, you’ll be able to sync your watch seamlessly with your phone.
Troubleshooting Connection Issues on iOS
If you’re using an iOS device and experiencing connection issues with your Amazfit T-Rex Pro, follow these troubleshooting steps to fix the problem.
1. Go to your phone’s settings and find Bluetooth settings.
2. Remove all devices by tapping on the “i” icon and selecting “Forget all the devices”.
3. Toggle Bluetooth off and then on again to refresh the connection.
4. Reboot both your Amazfit T-Rex Pro watch and your phone to reset the connection.
5. Log out of the Amazfit app on your phone and then log back in to ensure a fresh connection.
6. Clear the Bluetooth cache on your phone to resolve any conflicts.
7. Make sure your phone’s notification bar is functioning properly and not blocking any notifications from the Amazfit app.
8. Enable app alerts in the Amazfit app settings to ensure you receive notifications on your watch.
Following these steps should help resolve the connection issues between your Amazfit T-Rex Pro and your iOS device.
Troubleshooting Connection Issues on Android
If you’re using an Android device and facing connection issues with your Amazfit T-Rex Pro, don’t worry. Follow these simple steps to troubleshoot and resolve the problem:
1. Go to your phone’s settings and find the Bluetooth settings.
2. Clear the Bluetooth cache on your phone to ensure a fresh start.
3. Toggle Bluetooth off and then back on again to refresh the connection.
4. Reboot both your Amazfit T-Rex Pro watch and your Android phone.
5. Log out of the Amazfit app on your phone, and then log back in to establish a new connection.
6. Force quit the Amazfit app on your phone, and then reopen it to ensure a clean restart.
7. Keep your Amazfit T-Rex Pro away from other Bluetooth devices that may interfere with the connection.
8. If the problem persists, try using another phone to check if it’s a compatibility issue.
By following these troubleshooting tips, you can effectively fix the connection issues between your Amazfit T-Rex Pro and your Android phone.

Troubleshooting Syncing Issues
If you’re experiencing syncing issues between your Amazfit T-Rex Pro and your phone, there are several troubleshooting steps you can try:
1. Reboot your watch and phone
Start by rebooting both your Amazfit T-Rex Pro and your phone. This can help resolve any temporary software glitches that may be causing the syncing problem.
2. Open Additional settings on your watch
Swipe down from the watch home screen and open the Additional settings menu.
3. Find and tap Sync
Swipe up within the Additional settings menu to find the Sync option.
4. Tap Sync to upload the watch data
Tap on the Sync option to initiate the synchronization process and upload the watch data to your phone. This can help establish a proper connection between your watch and the companion app.
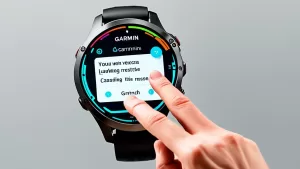
5. Submit a feedback report through the app
If the issue persists, consider submitting a feedback report through the Amazfit app. This will allow the developers to investigate the problem and provide a solution.
6. Uninstall and reinstall the Amazfit app
If all else fails, try uninstalling and reinstalling the Amazfit app on your phone. This can help resolve any app-related issues that may be interfering with the syncing process.
7. Clear Bluetooth cache and data on your phone
In your phone’s settings, locate the Bluetooth settings and clear the cache and data associated with Bluetooth. This can help eliminate any conflicts or corrupted data that may be affecting the connection.
8. Log out of the app and then log back in
Another potential solution is to log out of the Amazfit app on your phone and then log back in. This can refresh the app’s connection and potentially resolve any syncing issues.
By following these troubleshooting steps, you can resolve syncing issues between your Amazfit T-Rex Pro and your phone, ensuring that your data is accurately recorded and accessible.

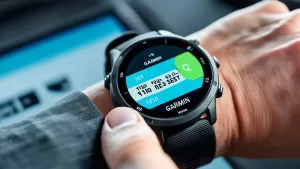
Troubleshooting Notification Issues
If you’re not receiving notifications on your Amazfit T-Rex Pro, there are several steps you can take to resolve the issue. Follow these troubleshooting tips to ensure you don’t miss any important alerts:
- Enable app alerts in the Amazfit app settings. Go to the app settings and make sure that notifications are turned on for the specific apps you want to receive alerts from.
- Check that Bluetooth is turned on your phone. Notifications rely on a stable Bluetooth connection between your phone and watch, so ensure that Bluetooth is enabled and functioning properly.
- Disable Do Not Disturb mode on your watch. If your watch is in Do Not Disturb mode, it will not display any notifications. Double-check the settings on your watch to ensure this mode is turned off.
- Ensure your phone’s notification bar is functioning properly. Swipe down from the top of your phone’s screen to check if the notification bar is displaying any recent alerts. If not, there may be an issue with your phone’s settings that is preventing notifications from being shown.
- Go to your phone’s settings and toggle off and on the app notifications. Sometimes, simply toggling the notifications for specific apps can help resolve any connection issues and ensure that you receive alerts on your watch.
- Make sure the Amazfit app runs in the background on your phone. Some devices may have aggressive battery optimization settings that force apps to close in the background, which can prevent notifications from coming through. Check your phone settings and make sure the Amazfit app is allowed to run in the background.
- For iPhone users, check the message and app notification settings in iPhone Settings. Make sure that the Amazfit app has permission to send notifications to your watch and that the notification settings for individual apps are configured correctly.
- Make sure you have enabled other notifications in the Amazfit app. In addition to app alerts, the Amazfit app allows you to receive notifications for calls, messages, and other events. Check the app settings to ensure that all the notifications you want to receive are enabled.
- If the issue persists, submit a feedback report through the app. The Amazfit app has a feedback feature that allows you to report any issues you’re experiencing. Provide detailed information about the notification problem, and the support team will assist you in resolving the issue.