The error message “Internet may not be available. Connect to another network” occurs only when you’re on Wifi. Some owners of the Samsung Galaxy Note 9 have been complaining about this problem and while it may seem like a serious one, it’s actually a minor network-related issue which you can fix on your own.
The thing is when it happens, your phone will still be connected to the network but you cannot browse the web or perform tasks that need stable connection. Most of the time this is a problem with your network but there are also times when the connection between your phone and your network need to be refreshed. Continue reading as I will provide you the most practical ways on how to address this problem.
Before we move on, if you have other issues with your phone and are looking for another solution, make sure you drop by on our Note 9 Help Guides as we already solved many reported problems with this device. We may already have published articles that could help you fix your problem so take a little time browsing through that page.
Now, going back to our troubleshooting, here are the things you need to do if you have “Internet may not be available” error on your Note 9…
Reboot your network equipment then your phone. You can do both at the same time, actually. But this is only applicable if you’re connected to your own Wifi hotspot. What you should do is unplug your modem or router from the power outlet. Leave it without power for a minute or two and then plug it back in.
On your phone, perform the forced reboot by pressing and holding both volume down and power keys at the same time for 10 seconds or more. Your device will reboot normally but it’s memory is refreshed and all its apps and services reloaded.
If the network is ready and your phone is already active, reconnect to the same network and browse the web. If you’re still getting the same error, then it’s time to troubleshoot your phone.
Forget Wifi networks. This is another way of refreshing your Wifi connection. You have to make your phone forget the network and then let it rescan the area to detect the same hotspot and then try to reconnect. Here’s how it’s done…
- From a Home screen, swipe up or down from the center of the display to access the apps screen.
- Go to Settings.
- Go to Connections.
- Go to Wi-Fi.
- Ensure that the Wi-Fi switch (upper-right) is turned on Switch on
- Tap the Wi-Fi network you wish to remove.
- Tap FORGET.
If the problem continues, then try the next procedure.
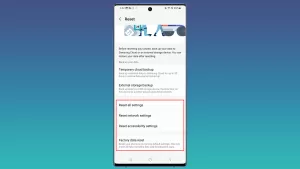
Reset Network Settings. You’re only having problems with the Wifi connection but you need to do this to refresh all your phone’s radios or network settings. This will bring all the settings back to their factory defaults and more often than not, this is what you need to do to fix any network-related issues.
- From the Home screen, swipe up on an empty spot to open the Apps tray.
- Tap Settings > General Management > Reset > Reset network settings.
- Tap RESET SETTINGS.
- If you have set up a PIN, enter it.
- Tap RESET SETTINGS. Once complete, a confirmation window will appear.
Once you’re done doing this procedure, the following changes will occur so make necessary changes…
- Stored Wi-Fi networks will be deleted.
- Paired Bluetooth devices will be deleted.
- Background data sync settings will be turned on.
- Data restrictive settings in applications that were manually turned on/off by the customer will be reset to the default setting.
- Network selection mode will be set to automatic.
Delete system cache. If the previous procedure still not able to fix the problem, then your next option is to delete your phone’s cache and replace it with a new one. There are times when problems like this are caused by some corrupt caches so for the sake of being thorough in our troubleshooting, try doing this procedure.
- Turn off the device.
- Press and hold the Volume Up key and the Bixby key, then press and hold the Power key.
- When the Android logo displays, release all three keys.
- An ‘Installing system update’ message will show for 30 – 60 seconds before the Android system recovery menu options appear.
- Press the Volume down key several times to highlight wipe cache partition.
- Press Power key to select.
- Press the Volume down key to highlight yes, them and press the Power key to select.
- When the wipe cache partition is complete, Reboot system now is highlighted.
- Press the Power key to restart the device.
Backup your files and data and perform the Master Reset. After doing all the things mentioned above and the problem continues to bug down your phone, then you have no other choice but to reset your phone. Make sure to backup your important files and data as they will be deleted during the process. Once everything is set and ready, follow these steps to reset your phone.
- Back up data on the internal memory. If you have signed into a Samsung account on the device, you have activated Anti-theft and will need your Samsung credentials to finish the master reset.
- Turn off the device.
- Press and hold the Volume Up key and the Bixby key, then press and hold the Power key.
- When the green Android logo displays, release all keys (‘Installing system update’ will show for about 30 – 60 seconds before showing the Android system recovery menu options).
- Press the Volume down key several times to highlight ‘wipe data / factory reset’.
- Press Power button to select.
- Press the Volume down key until ‘Yes — delete all user data’ is highlighted.
- Press Power button to select and start the master reset.
- When the master reset is complete, ‘Reboot system now’ is highlighted.
- Press the Power key to restart the device.
I hope that we’ve been able to help you fix the problem with your device. We would appreciate it if you helped us spread the word so please share this post if you found it helpful. Thank you so much for reading!
RELATED POSTS:

