How To Fix iPhone SE Won’t Connect To WiFi
Having issues iPhone SE won’t connect to WiFi can be incredibly frustrating. You rely on WiFi to browse the web, stream content, and use apps, so when that connectivity goes down, it can feel like your phone is useless. Luckily, there are a few troubleshooting steps you can take to get your iPhone SE connecting to WiFi again.
In this article, we’ll walk you through some of the most common fixes for when your iPhone SE refuses to connect to WiFi. We’ll show you how to forget the network and reconnect from scratch, reset network settings entirely, check for software updates, toggle airplane mode on and off, and more. With just a few simple steps, you can get your WiFi working again and your iPhone SE back online. Follow along as we take you through effective solutions to fix your stubborn WiFi connectivity problems.
Fix iPhone SE Won’t Connect To WiFi
If you’re experiencing difficulties with your iPhone SE not connecting to WiFi, this article will provide you with practical solutions to troubleshoot and resolve the issue.
Check for Outages
To fix the issue of iPhone SE not connecting to WiFi, check for network outages. Sometimes, the problem may be due to an outage in your area. Contact your internet service provider or check their website for any reported outages. If there are no outages, consider seeking further assistance from Apple Support or an authorized service center.
Reboot the Router
Simply power it off, wait for a few seconds, and then turn it back on. This simple troubleshooting step can often fix common connectivity issues. If the problem persists, consider seeking further assistance from Apple Support or an authorized service center.
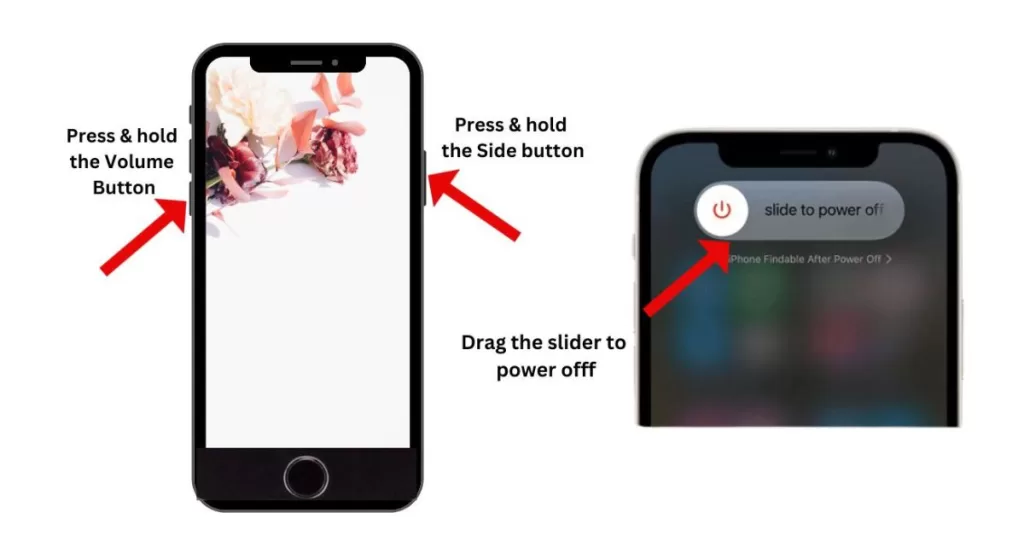
Restart the iPhone
Restart iPhone by holding the Side button and swiping to power off. Wait 30 seconds, then turn back on. Restarting refreshes the network components.
If the problem persists, consider seeking further assistance from Apple Support or an authorized service center.
Toggle Airplane Mode
Toggle Airplane mode on, wait 15 seconds, then turn off again. This forces the iPhone to reconnect to Wi-Fi networks.
This simple troubleshooting step can help resolve connectivity problems. If the issue persists, seek further assistance from Apple Support or an authorized service center.
Forget the Network
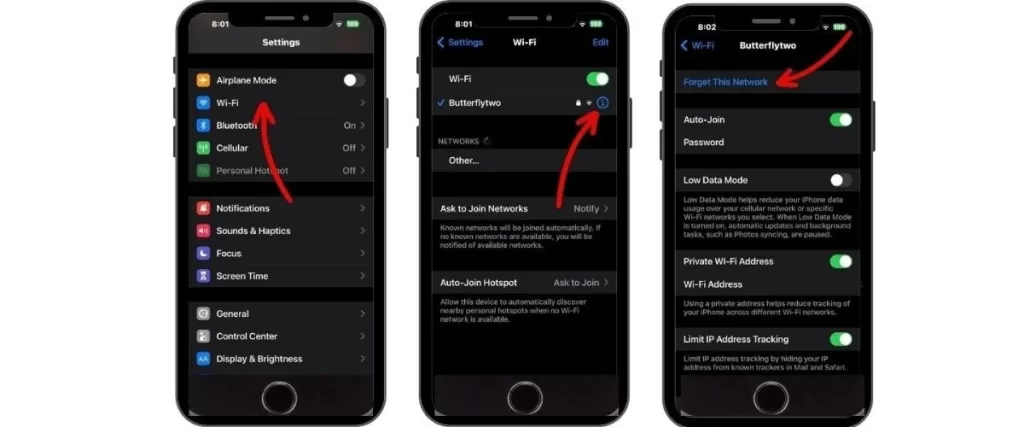
Go to Settings > Wi-Fi and delete the problem network. Then rejoin the network by re-entering the password. This fixes network conflicts.
Reset Network Settings
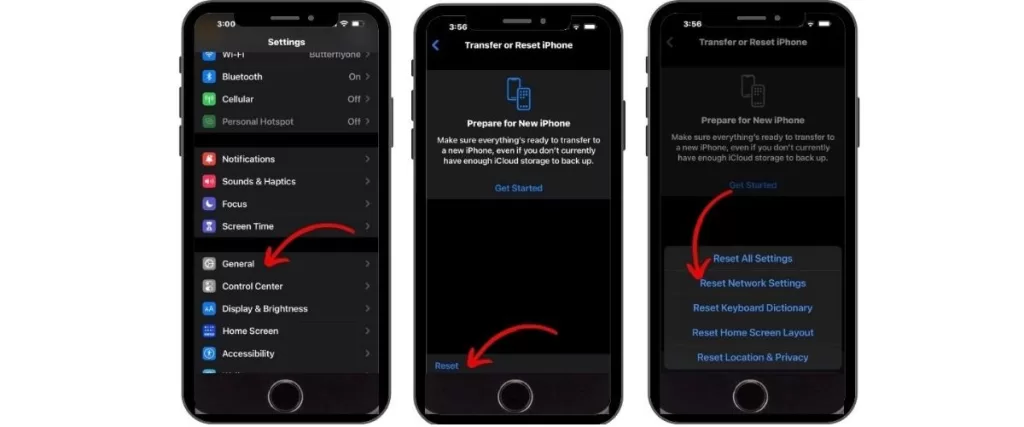
Reset network settings in Settings > General > Transfer or Reset iPhone>Reset to wipe all Wi-Fi info. You’ll have to rejoin networks afterwards.
Update iOS Software
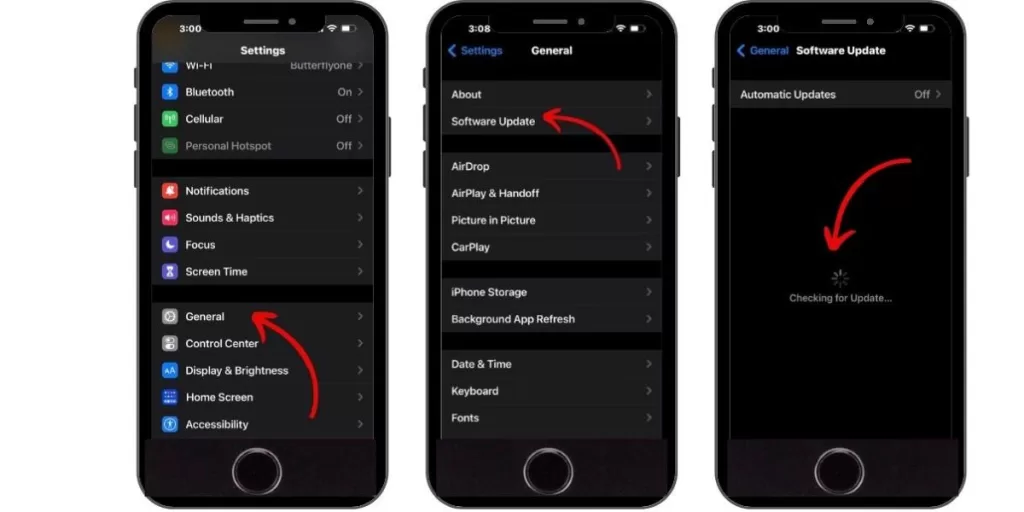
Install the latest iOS updates, which often include bug fixes for Wi-Fi problems. Go to Settings > General > Software Update.
Disable Wi-Fi Assist
Turn off Wi-Fi Assist in Settings > Cellular if you think it’s causing connections to drop by switching to cellular data.
Change DNS Settings
Manually configure DNS settings to Google or OpenDNS servers if your ISP DNS may be faulty. Go to Settings > Wi-Fi > (i) >Configure DNS.
Reset All Settings
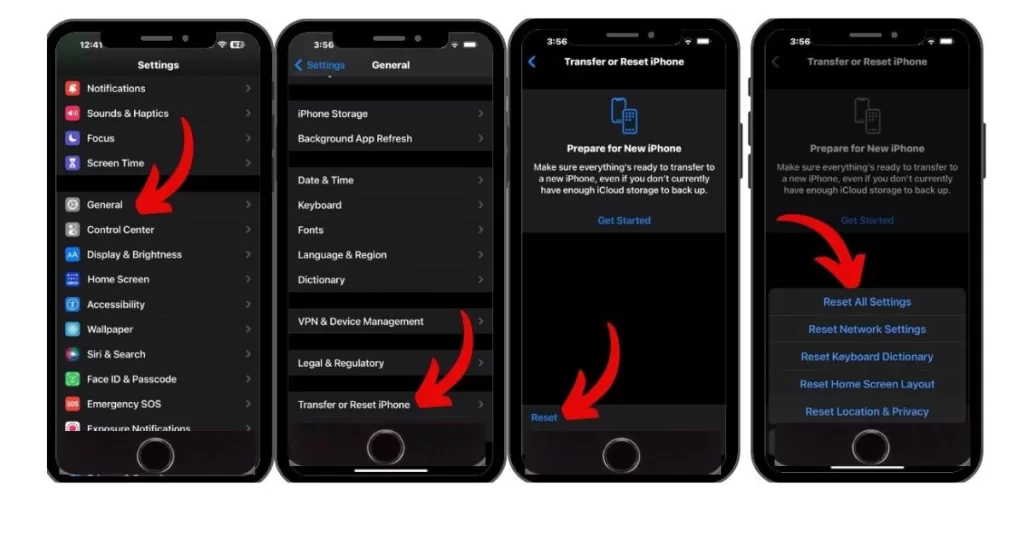
Erase all settings in Settings > General > Transfer or Reset iPhone>Reset>Reset All Settings. This fixes software issues while retaining your data. You’ll have to reconfigure settings afterwards.
Persistent iPhone Wi-Fi problems are annoying, but taking methodical troubleshooting steps will uncover the issue. Try rebooting, resetting, updating, and reconfiguring system settings to get your connectivity back up and running. With a little trial and error, your iPhone Wi-Fi woes will dissipate.