Face ID Not Working on iPhone 11? Here’s the fix
Face ID not working on iPhone 11? Don’t worry – you’re not alone. Many iPhone 11 users have experienced issues with Face ID at some point. The good news is, most Face ID problems can be fixed fairly easily. In this article, I’ll walk you through the top troubleshooting tips to get Face ID working again on your iPhone 11.
Face ID Not Working iPhone 11
Restart Your iPhone
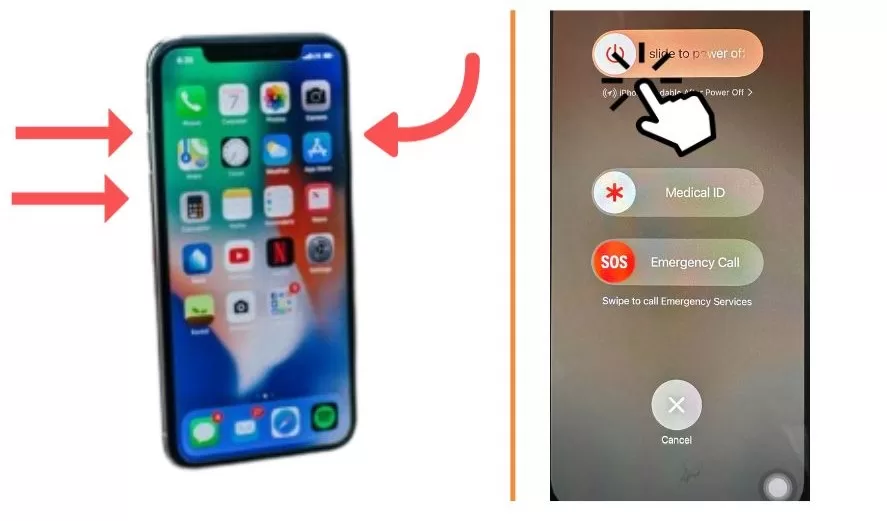
An iPhone restart is the first thing to try whenever you encounter any problem on your device. Restarting clears out memory, ends background processes, and refreshes the operating system. Follow these steps:
- Press and hold the Side button and either Volume button until the power off slider appears.
- Drag the slider to turn off your iPhone.
- After 30 seconds, press and hold the Side button again until you see the Apple logo.
Give Face ID a try after the restart completes. Often, this basic reset is all you need to fix Face ID.
Check Face ID Settings
Make sure Face ID is fully set up and enabled in your device settings.
- Open Settings > Face ID & Passcode
- Enter your passcode if prompted
- Ensure Face ID is toggled ON
- Check that all Face ID features like iPhone Unlock are enabled

Adjust any incorrect settings to get Face ID working properly again.
Update Your iPhone Software
Outdated software can cause problems with Face ID. Updating your iPhone to the latest iOS version can often resolve Face ID bugs and glitches.
Here’s how to update your iPhone:
- Go to Settings > General > Software Update
- Tap “Download and Install” to update to the latest iOS

Try Face ID again after the update completes.
Clean the Cameras
Dirt, smudges, and debris on the front-facing TrueDepth camera and infrared sensors can interfere with Face ID. Gently clean these components with a soft, dry cloth.
Hold your iPhone 11 vertically and locate the camera and sensors near the top of the screen. Carefully wipe this area to remove any dust or grime.
Adjust Your Face Position
For Face ID to work properly, you need to hold your iPhone 11 at the right distance and angle from your face.
The ideal distance is 10-20 inches away. Avoid holding your iPhone too close or too far away when using Face ID.
Also, make sure you’re looking directly at your iPhone’s screen when activating Face ID. Angle the top of your iPhone towards your face.
Slight adjustments to your face position can help get Face ID detecting your face accurately again.
Remove Face Coverings
Anything partially covering or obscuring your face can confuse Face ID, causing it not to recognize you.
Take off hats, scarves, masks, or other items covering your eyes, nose or mouth when using Face ID. Also remove sunglasses if they are interfering with Face ID.
With your entire face clearly visible, Face ID will be able to map your facial features properly.
Add an Alternate Appearance
Major changes in your appearance can affect Face ID. If you’ve altered your look recently – like growing a beard or getting a new hairstyle – try adding an alternate appearance.
- Go to Settings > Face ID & Passcode
- Tap “Set Up An Alternate Appearance”
- Follow the on-screen instructions to capture your new look
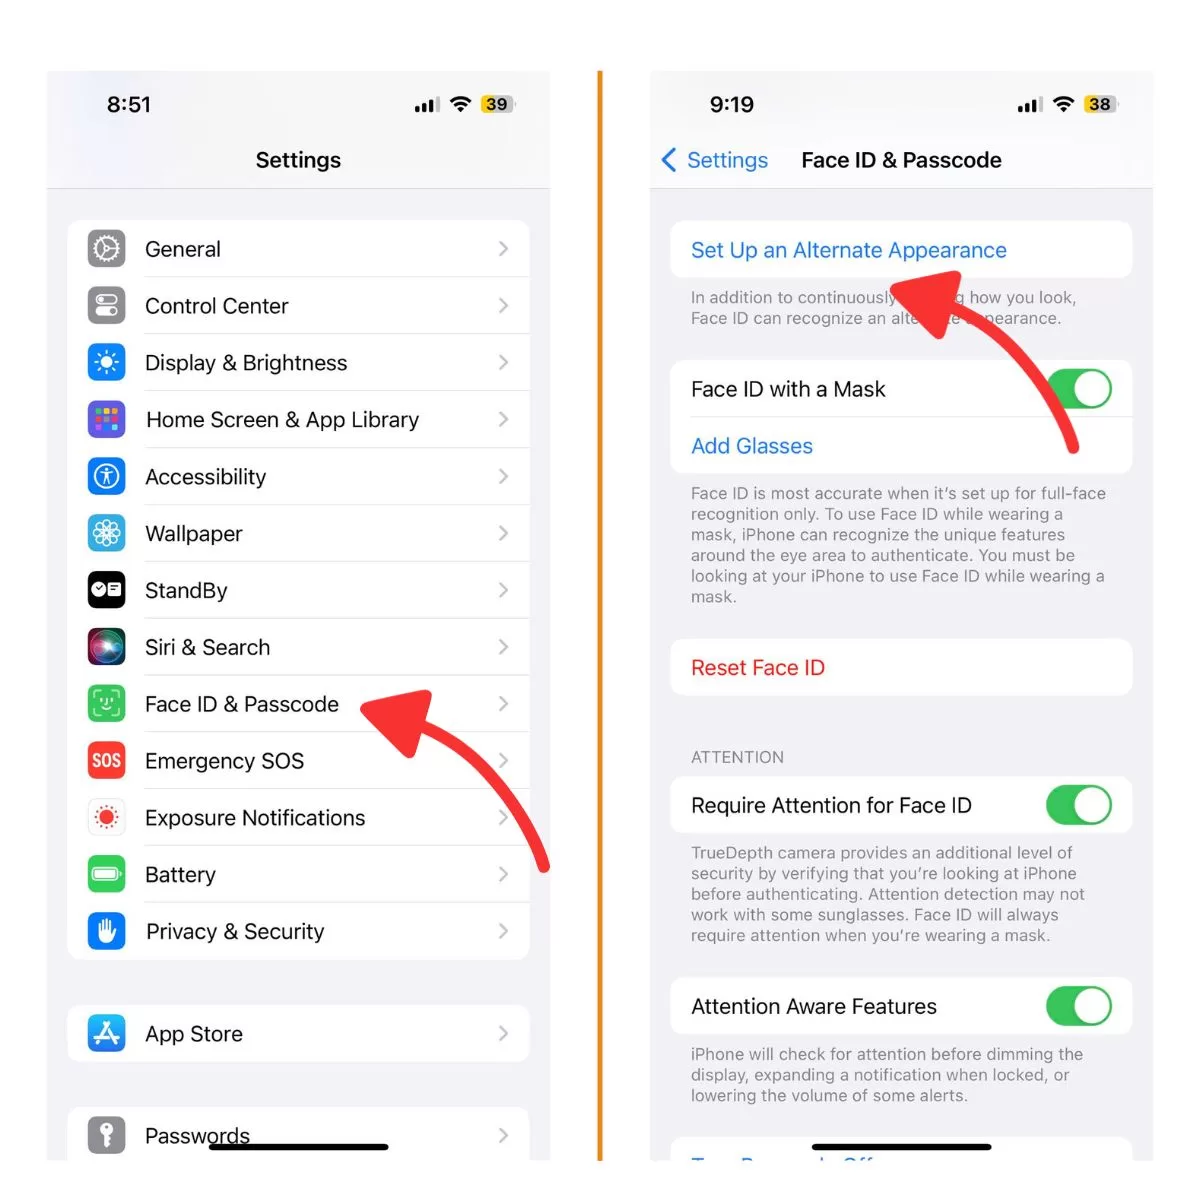
This will help train Face ID to recognize your face even after significant changes.
Reset Face ID
Still struggling with Face ID? Resetting Face ID removes any saved face data, forcing you to set it up from scratch. Often, this fixes Face ID problems stemming from a faulty initial setup.
Follow these steps:
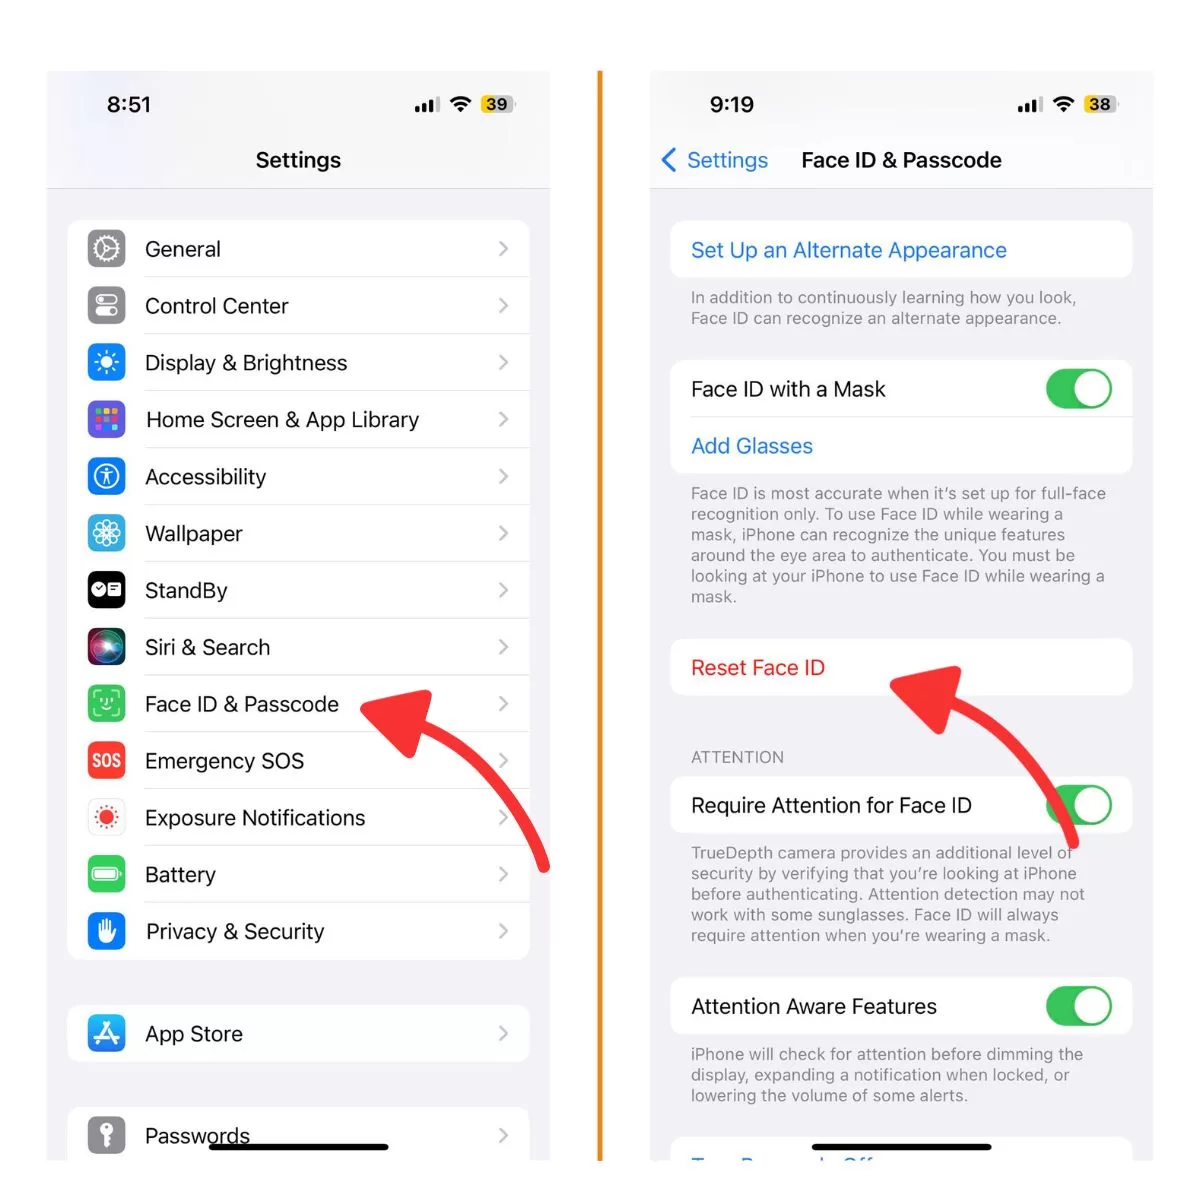
- Go to Settings > Face ID & Passcode
- Enter your passcode
- Tap “Reset Face ID” > “Set Up Face ID”
- Align your face in the frame and follow the setup prompts
Re-enrolling your face may resolve the issue.
Factory Reset iPhone
A factory reset will wipe your iPhone 11 and restore it to default settings. Only use this method if nothing else has worked, as you’ll lose all data.
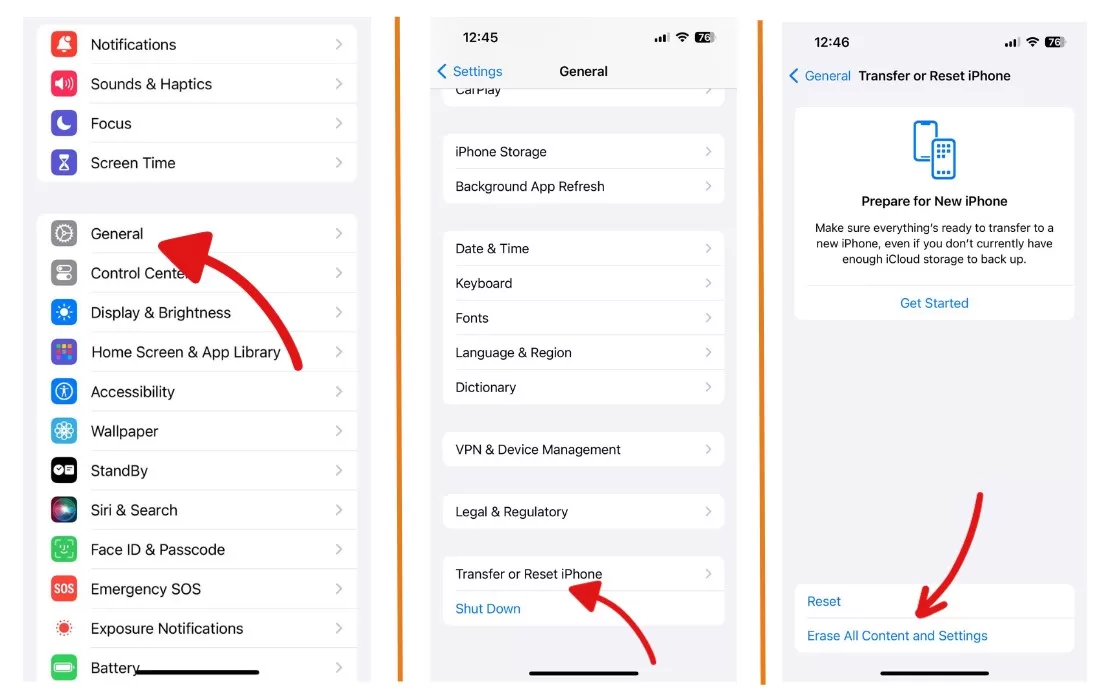
- Back up your iPhone to iCloud or iTunes first
- Go to Settings > General >Transfer or Reset iPhone > Erase All Content and Settings
- Enter your passcode if prompted, then confirm the reset
Once your iPhone resets, you can restore your backup and set up Face ID again.
Contact Apple Support
For hardware-related Face ID problems or damage involving the TrueDepth camera, you may need professional repair service. Contact Apple Support online or schedule a Genius Bar appointment at an Apple Store. Trained technicians can properly diagnose the issue and replace any faulty Face ID components if needed.
Don’t let Face ID issues keep you from enjoying your iPhone. Try the tips in this article to get facial recognition working smoothly again. With some simple troubleshooting, you can fix Face ID and get back to unlocking your iPhone 11 with just a glance.